2014 Jeep Wrangler – Another Full Audio System Upgrade
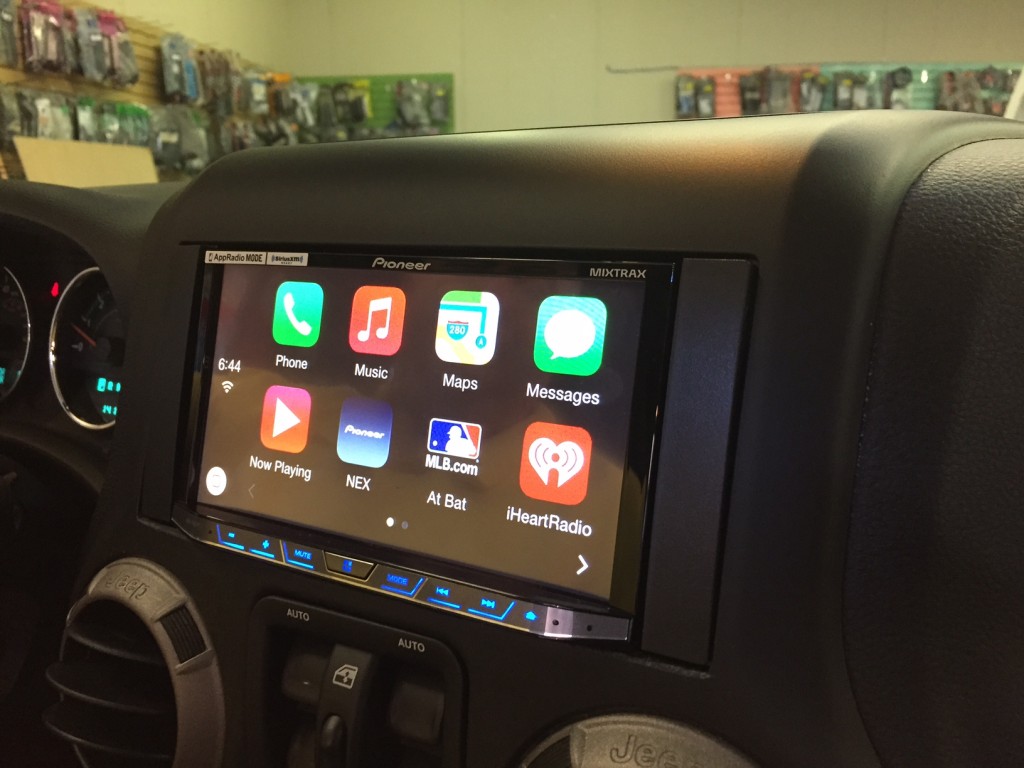
This week in the shop we had another Jeep Wrangler here for an audio upgrade. For this Jeep system, the customer opted for the new Pioneer AVH-4100NEX and a stealth custom Jeep Wrangler subwoofer upgrade.
Pioneer AVH-4100NEX Jeep Wrangler
The AVH-4100NEX is a great option for Wrangler owners for a variety of reasons:
Apple CarPlay Compatible
Android Auto Compatible
Anti-theft Detachable Face!
4 Volt preouts for Front, Rear and Subwoofer
13 Band EQ
Digital Time Alignment
For anyone looking for great cell phone integration, anti-theft detachable face and a great head unit to build an audio system with – the AVH-4100NEX really fits the bill. You can read more about this model in this post here. Additional equipment in this build included Morel Virtus component speakers for the front, Morel Tempo coaxes for the rear sound bar, an Alpine PDX-V9 5 channel amplifier and a good amount of Dynamat.
Jeep Wrangler Custom Stealth Subwoofer
Since theft is always a concern in Jeep Wranglers, we chose to go for a custom built Jeep Wrangler subwoofer enclosure molded into the rear quarter panel. Although JL Audio offers a few different Jeep Wrangler subwoofer boxes, none of them would really work well for this customer’s application.
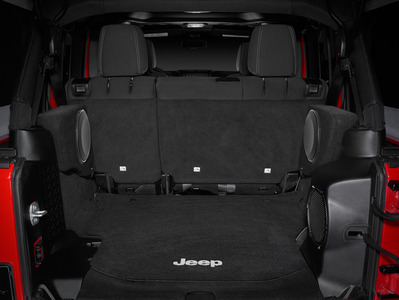
JL Audio offers a Stealth Jeep Wrangler Subwoofer Enclosure for 2007 and up Jeep Wrangler Unlimited
The 13″ TW5 is a bit oversized and it’s really the first generation of JL Audio’s slim line subwoofers – meaning JL Audio has had time to perfect their flat line subs and in our experience, the newest TW1’s have the best sound quality out of all their flat line subwoofers. The 13″ TW5 is not bad, but the TW1’s are definitely tighter, cleaner and more natural in tone.
JL Audio 10TW1 Jeep Wrangler Subwoofer Sub Boxes
JL has had made some new Jeep Wrangler subwoofer enclosures using the 10″ TW1, but the enclosures are placed in a somewhat awkward position. Additionally, there are different methods for mounting the TW1 enclosure depending on whether you have the hard top or soft top. Well, in New England, we usually have both. So that wasn’t really going to work for us.
We decided to remove the stock Jeep Wrangler subwoofer panel in this 2014 Jeep Wrangler Unlimited and replace it with the plain panel from Jeep and build an enclosure to fit in the factory location using the JL Audio 12″ TW1. The enclosure was made with some fiberglass and some wood and was build exactly to manufacturer recommendations for the 12″ TW1 (.65 cubic feet – sealed).
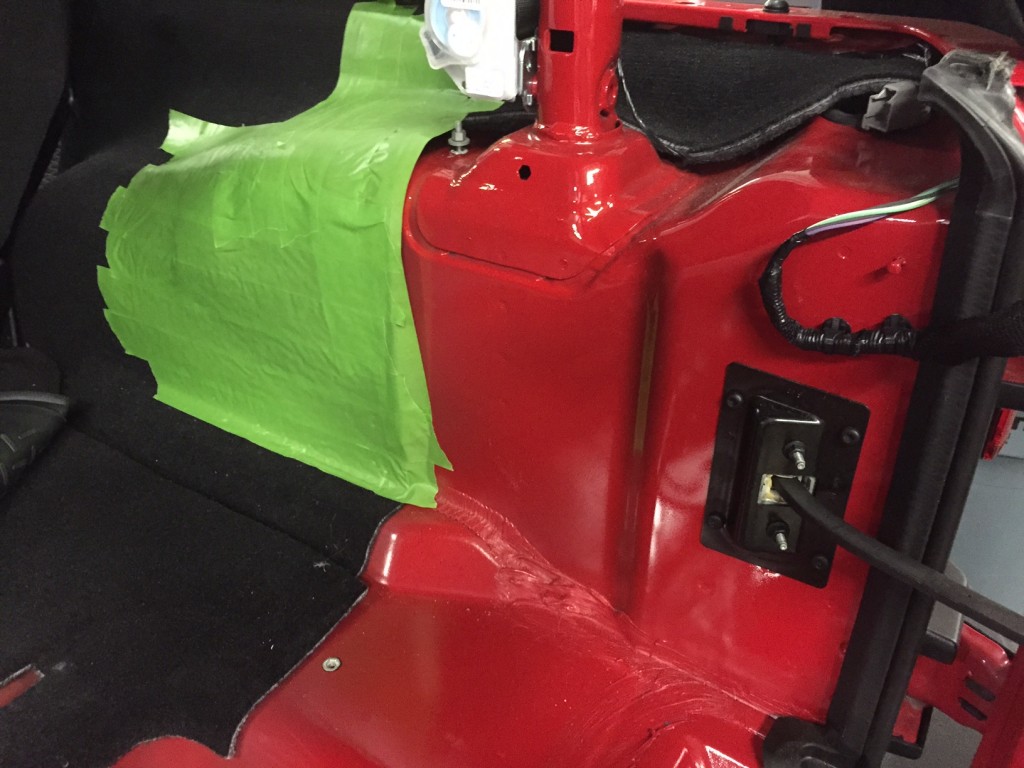
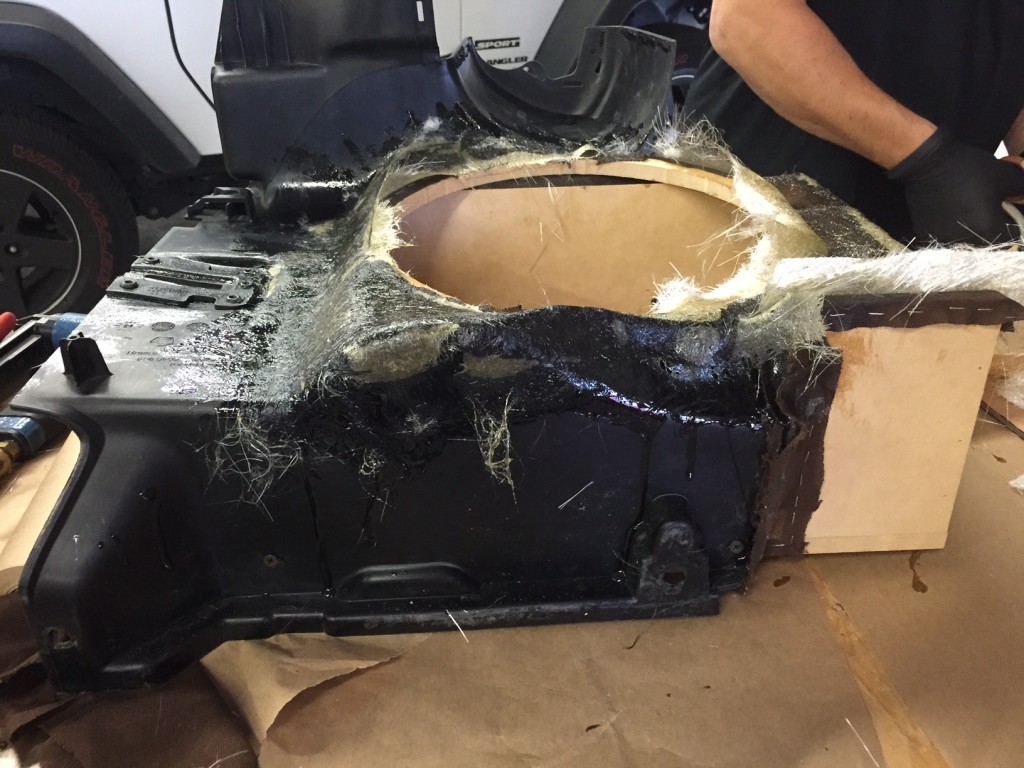
Preparing for Custom Jeep Subwoofer Enclosure
First John removed the OEM panel and began prepping the area to begin fiber-glassing.
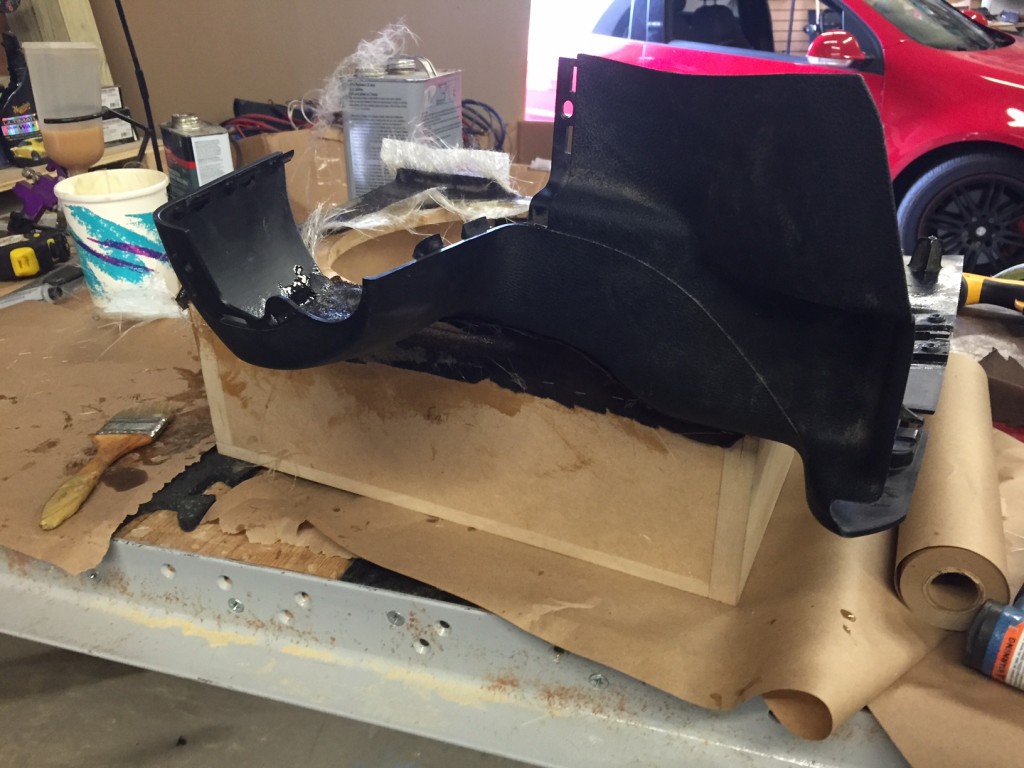
Marrying Wood and Plastic Panel to Make Custom Jeep Subwoofer Enclosure
The enclosure needed to be attached to the new plain Jeep panel and worked together to create an aesthetically pleasing appearance that was also functional.
Fabricating a Custom Subwoofer Enclosure for Jeep Wrangler Unlimited
He continued to blend the two panels together.
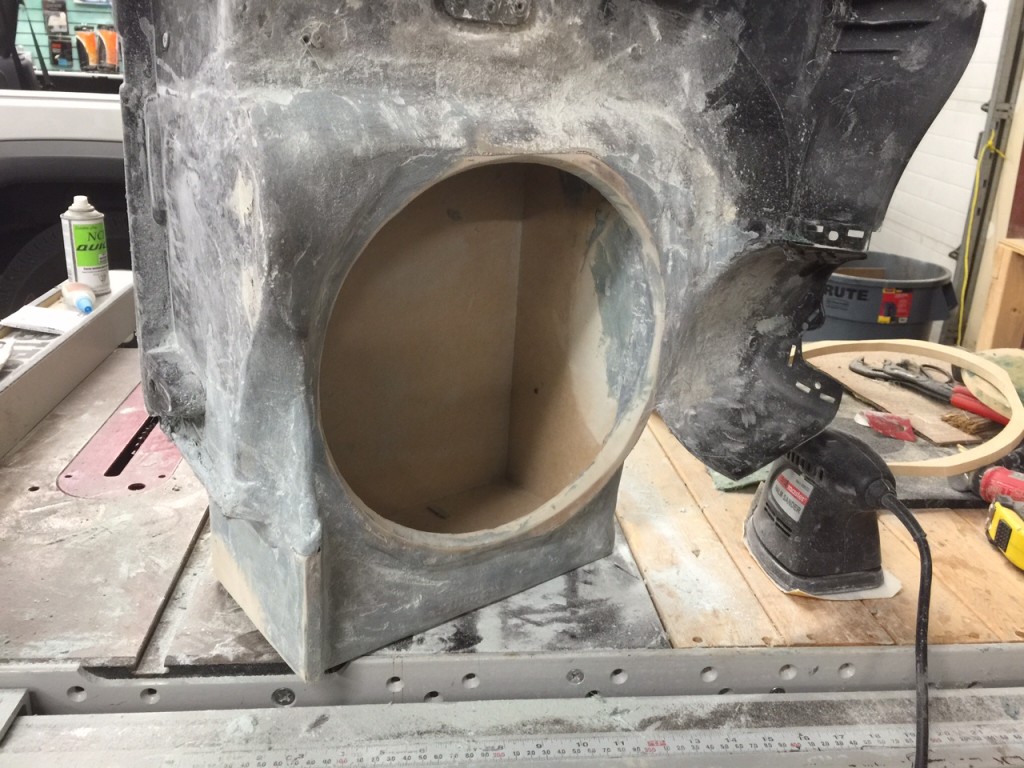
Starting to look like a finished product.
Once the material was dry, he smoothed it all out so it could be carpeted to match and blend into the vehicle.
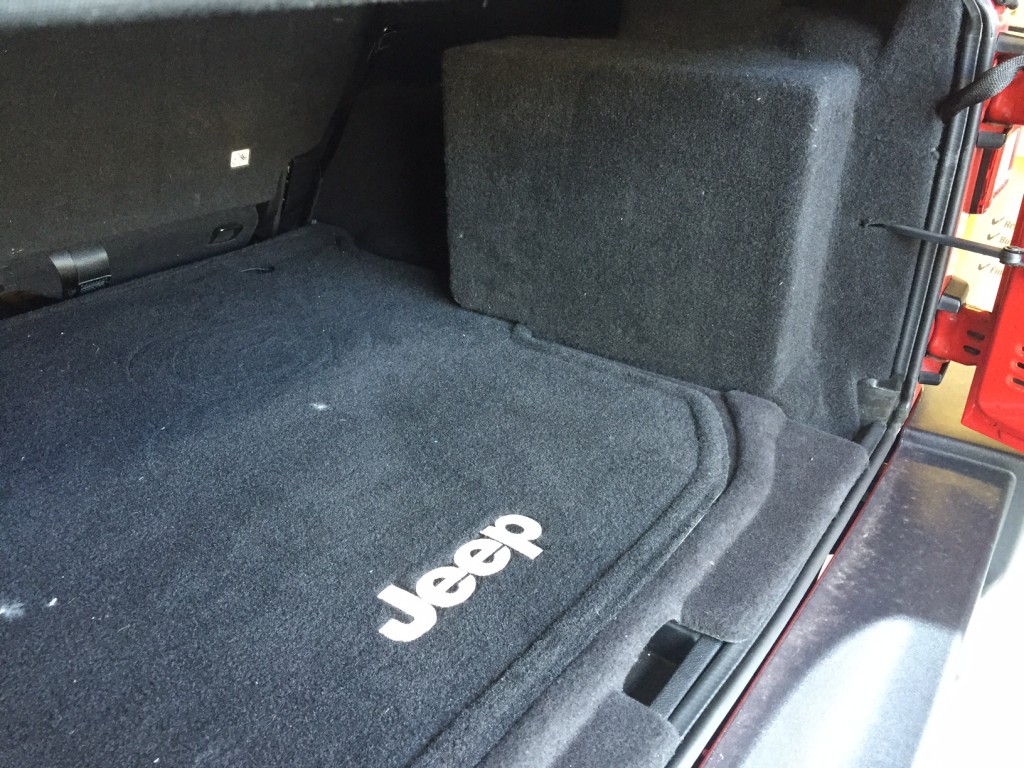
Custom Jeep Wrangler Subwoofer Enclosure – Blends in nicely.
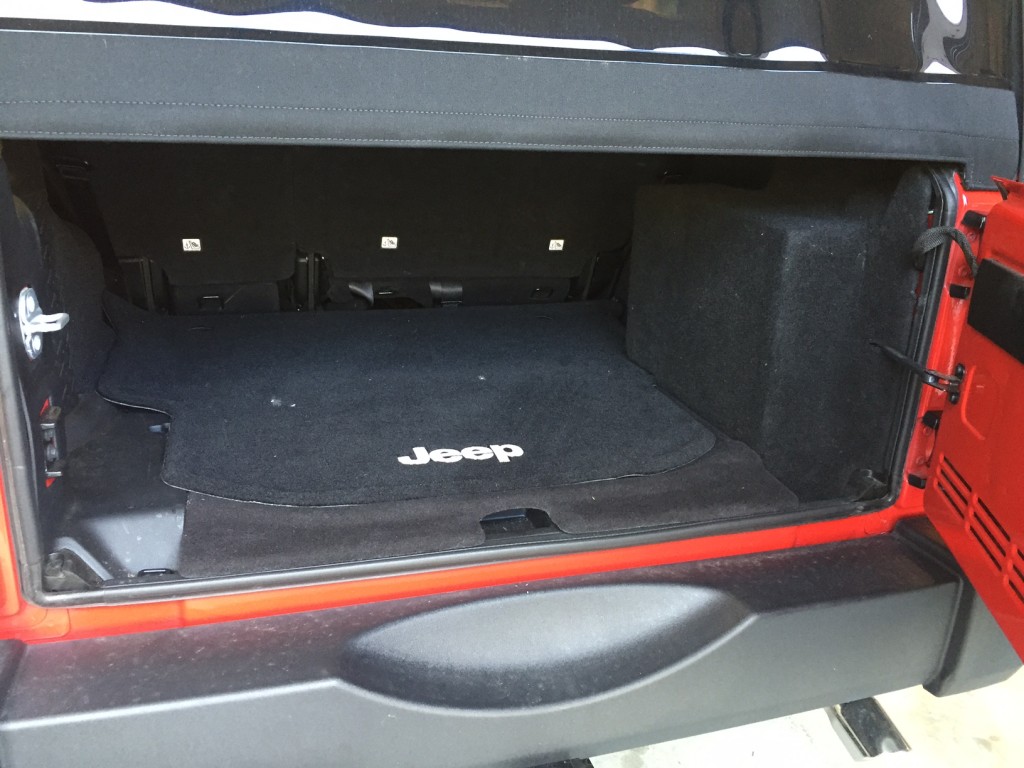
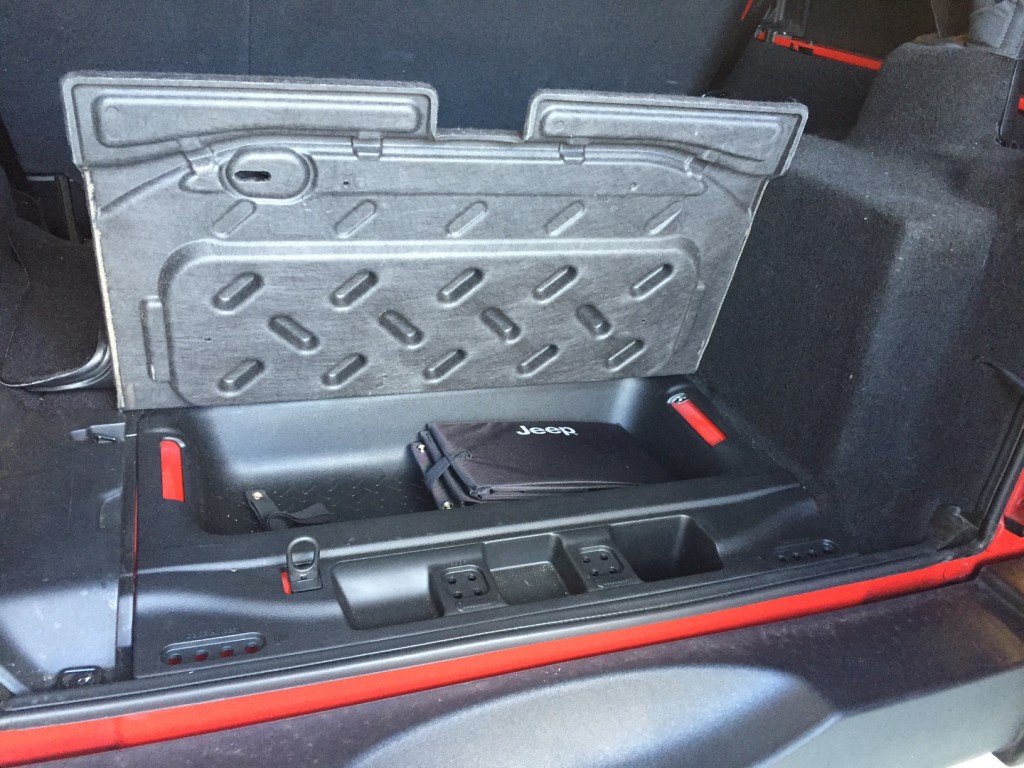
The finished product sounded amazing and is blended into the vehicle in a clean and unobtrusive manner. The customer still had access to the lower storage compartment as well.
Jeep Wrangler Unlimited Custom Subwoofer – Storage still accessible.
The end result was a well integrated Jeep Wrangler audio upgrade that provided crystal clear, punchy, warm and smooth sound even at extremely loud volume levels – perfect for those warm summer drives with the top off. If you’re a Jeep Wrangler owner in need of an audio upgrade in CT or NY, please contact our shop Sounds Incredible Mobile (proudly serving customers from Brookfield, Danbury, New Milford, Newtown, New Fairfield, Ridgefield, Brewster, Mahopac, Carmel and more).
BavSound for BMWs – Better Sound Simply from Better Speakers?
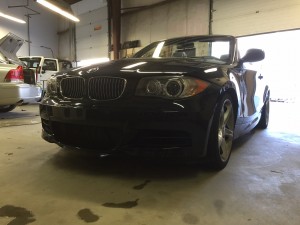
BavSound Stage One Review – BMW 1 Series
Recently our shop was presented with the opportunity to install and review the BavSound Stage One Speaker Upgrade in my buddy’s 2010 BMW 135i convertible. I had not heard these speakers in person and I was truly curious about what kind of improvement could be achieved with a simple $388 speaker upgrade.
Considering what we normally do to upgrade a stock BMW sound system, I wasn’t expecting much from a simple speaker upgrade. The average ticket on a BMW audio upgrade at our shop usually ranges from $3500 – $6500 depending on which stock stereo the vehicle is equipped with and depending on the quality of speakers the customer chooses (usually Morel speakers – either Tempo, Virtus or Hybrid).
For vehicles without the Logic 7 fiber optic amp, we normally would recommend:
Upgrading the door speakers and tweeters
Installing a better quality amplifier to power those new speakers along with powering up the stock under seat subwoofers
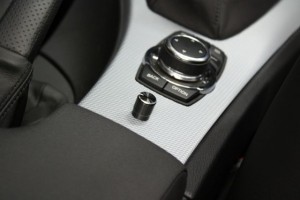
Installing a more traditional car audio subwoofer (and mono amplifier) in the trunk along with a dedicated subwoofer control knob discreetly mounted like so:
Example of PAC LC1 universal bass knob installed in a BMW 3 series
If you have the Logic 7 system, I’d tack on another $800 or so in digital pre-amplifer interfacing. Oh, and I’d ask you to drop your car off for 2-3 days to do all this work. Huh, when I put it that way, kind of sounds like a LOT to ask for a stereo upgrade! What if you want to upgrade your BMW stereo without completely overhauling it and dropping a few grand?
Why can’t we just upgrade the speakers?
That’s actually a common request I get from customers coming into our shop looking for better sound quality. Their logic is better speakers should provide better sound quality. Although that’s a logical thought, typically what happens is I’ll get on my soap box and explain that,
“When it comes to upgrading your stock audio system, speakers are not the place to start. It’s like taking two steps forward and one step back. You’re limited to the sound quality and output of the original stereo and amplifier. You might put better quality speakers in your car, but without also upgrading the source unit and/or upgrading the amplifier, you’ll never really get the full potential of the car audio speakers.”
Yeah, well, after hearing these speakers, I don’t think I’ll be saying THAT anymore – to my BMW customers anyways.
BavSound Stage One Review – These speakers are a game changer.
My standard sales pitch is true when we’re talking about aftermarket speakers that have been designed and engineered to work with aftermarket stereos and aftermarket amplifiers, but what about a company that decided to engineer speakers for the stock stereo and amplifier? What if they designed the speakers around the car? Then my friends, you have a game changer and that’s exactly what the BavSound Stage One Speaker Upgrade is.
Speakers Designed and Engineered for your BMW
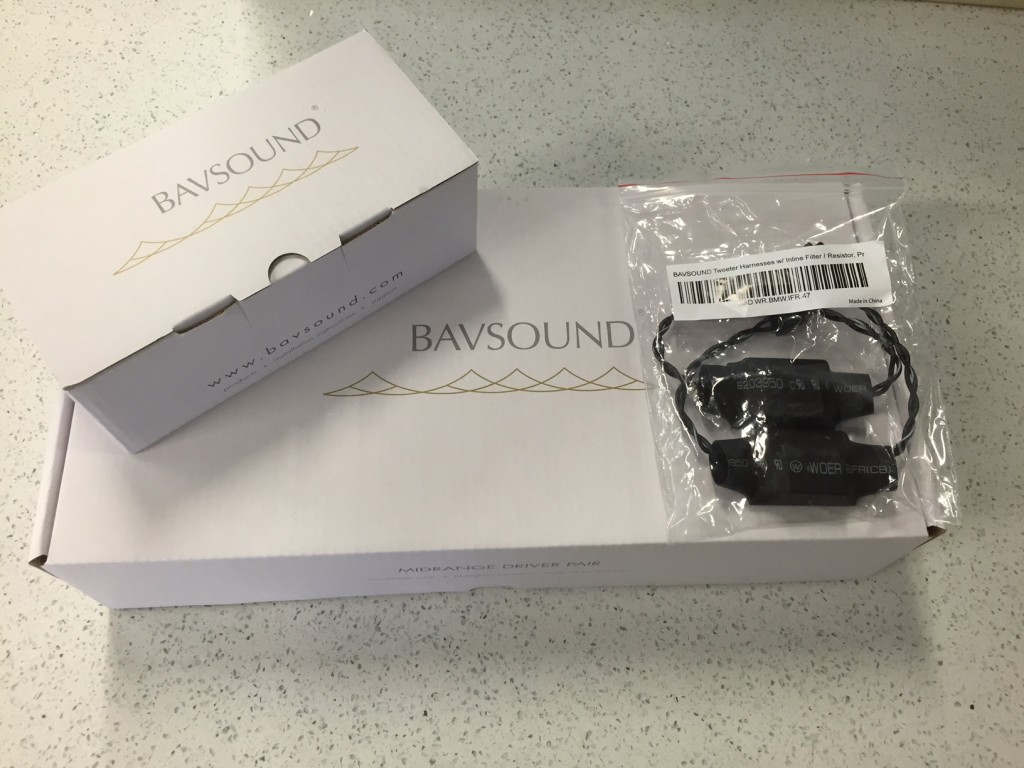
BavSound believes that upgrading the sound system in your BMW should be easy. They are so passionate about making BMW audio upgrades easy that they created a line of speakers engineered specifically for BMW vehicles with a true plug and play design.
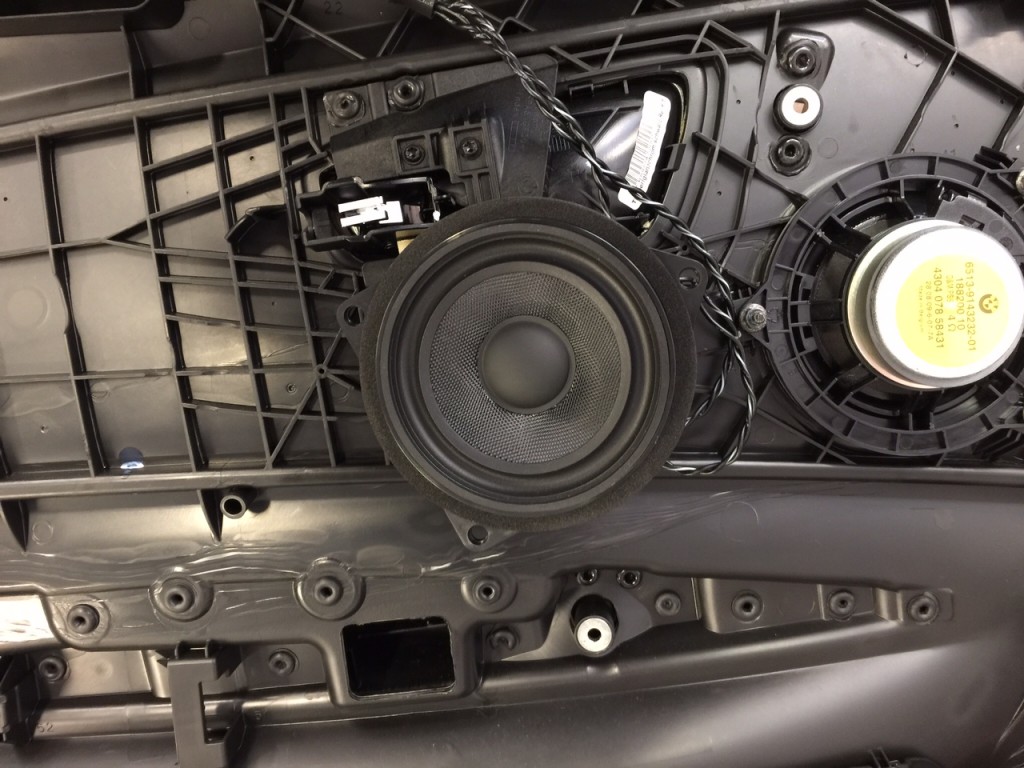
BavSound Stage One Speaker Upgrade BMW 1 Series – No modification necessary!
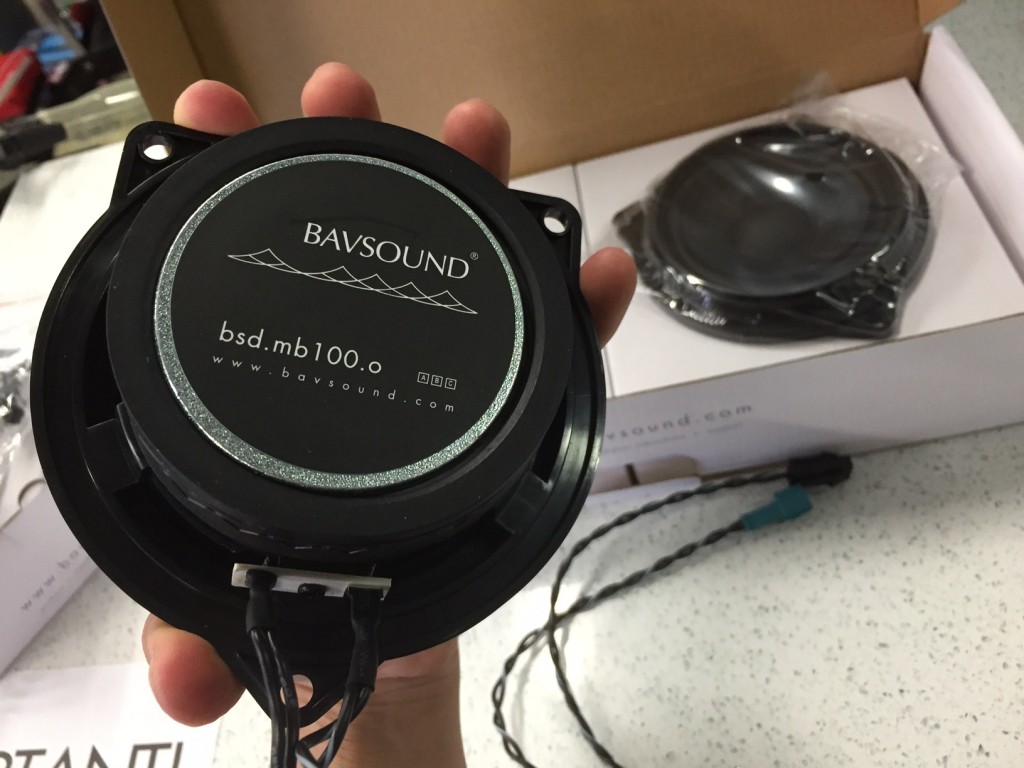
Really – these speakers plug right in to factory speaker connectors and they match factory speaker mounting points:
BavSound Stage One Speaker Upgrade – Can’t beat a plug and play design.
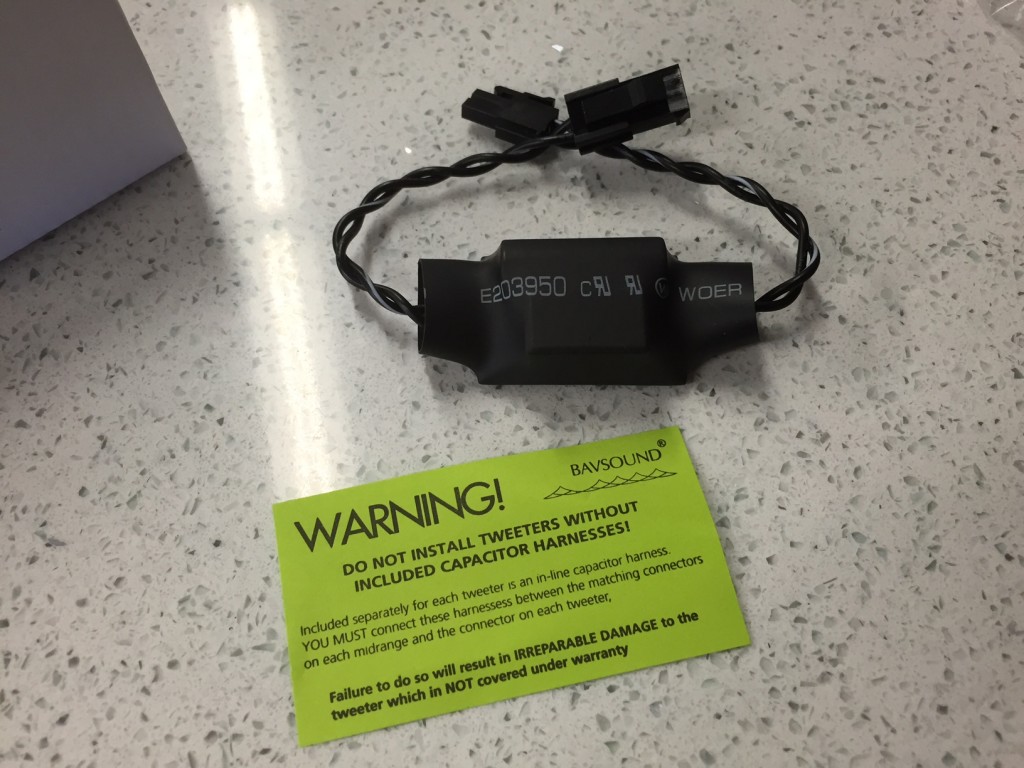
BavSound makes the installation pretty hard to screw up. I love the instructional inserts:
BavSound Stage One Review – Easy Installation is a major benefit.
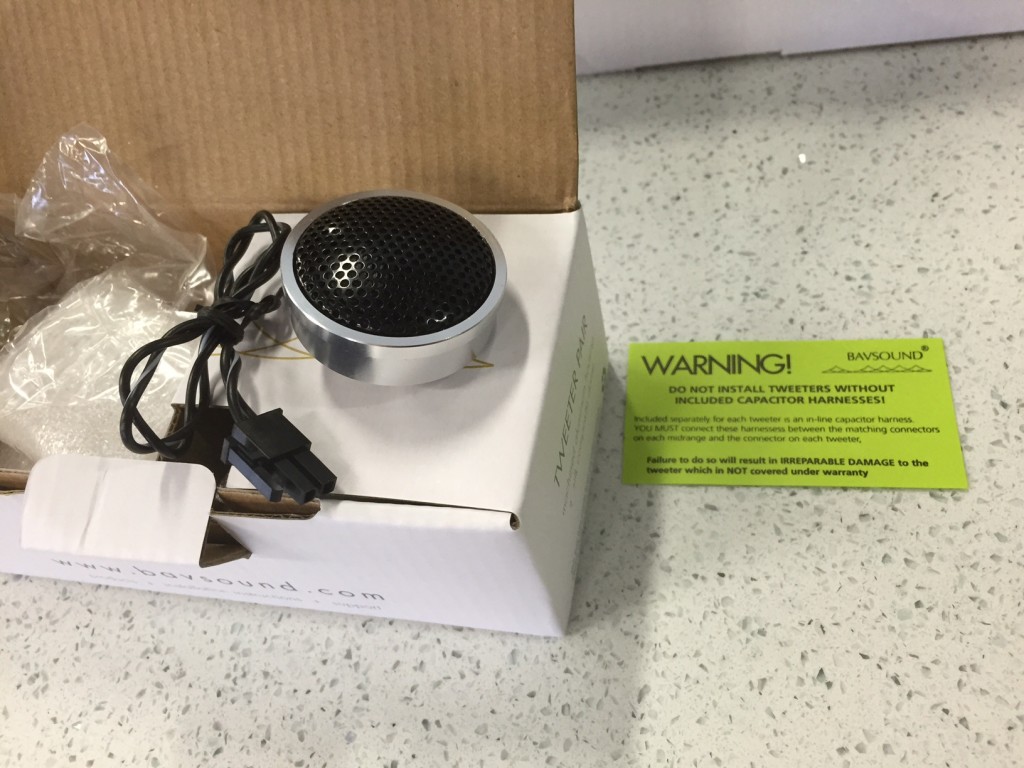
Right out of the box I could see and feel the quality of the drivers. Midrange speakers are made of a quality fiberglass weave and the surprisingly heavy tweeters feature a silk dome.
BavSound Stage One Tweeters – Silk dome is where it’s at.
This combination of quality speaker materials coalesces to create sound reproduction that is warm, natural and smooth.
BavSound Stage One Review – How did it sound BEFORE?
Well first off, let’s talk about how the factory speakers sound in this base BMW stereo.
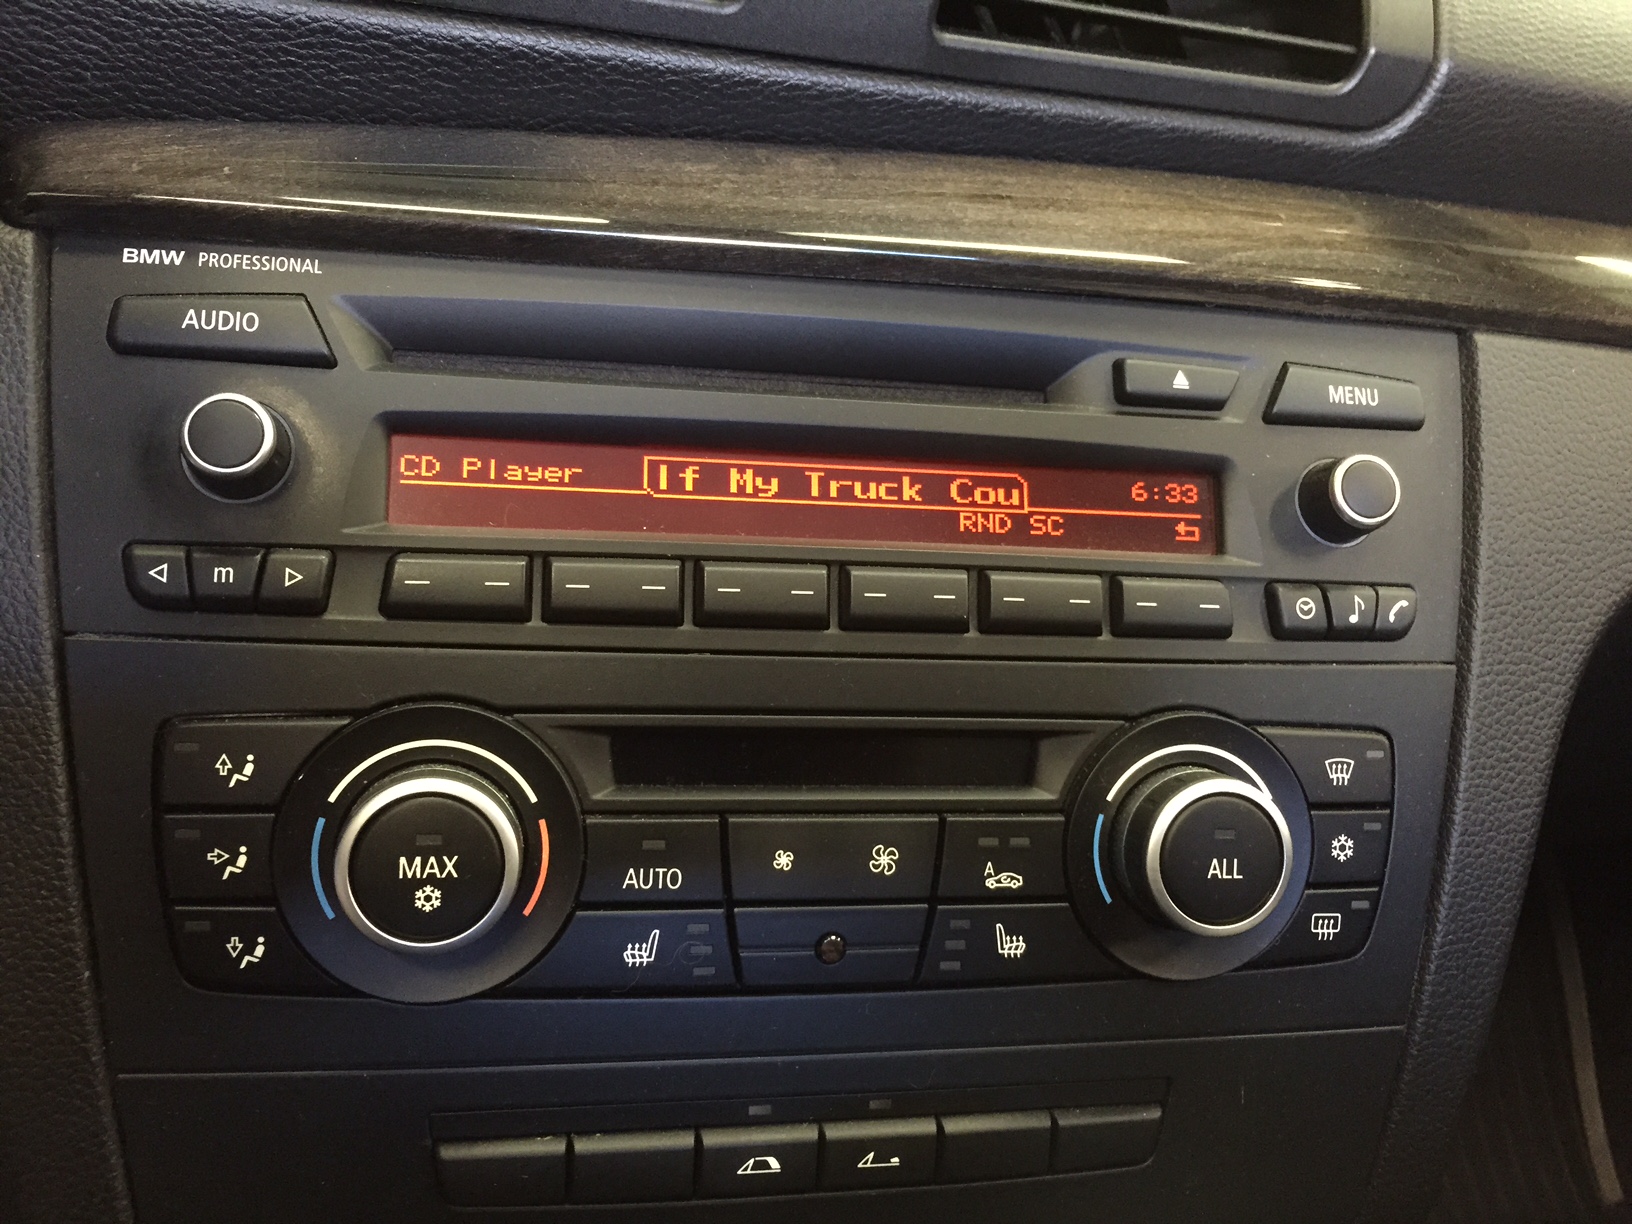
If My Truck Could Talk – Really, Scott? That’s what your listening to?
I turned up whatever was in my buddy Scott’s CD player and took a listen. Ah yes, there it was. The typical BMW stereo sound:
No top end detail whatsoever – remember the base radio doesn’t even have tweeters.
Very muddy mid range – unpleasant is putting it kindly.
The bass – no deep punchy bass here, but certainly plenty of boomy shallow bass coming from those stock under seat subwoofers.
BavSound Stage One Review – How did it sound AFTER?
BavSound Stage One – Easy Installation with Amazing Sound Quality Improvement
Pretty freaking amazing is putting it lightly. Scott, hubby John and I were all extremely impressed with the sound quality improvement achieved with such a simple upgrade. Remember, we just did front speakers. That’s it. Two midranges and two tweeters.
I think Scott’s exact response was,
“Wow – that’s just from new front speakers? (Pause) Wow! That’s pretty impressive”.
For reference, Scott is no stranger to high fidelity car audio equipment. In his GMC Sierra he has Morel Hybrid speakers, JL Audio Slash Series amplifiers, Sony GS head unit and JL Audio TW3 subwoofers in a custom enclosure. He’s used to pretty good sound quality in his vehicles and he’s used to spending a lot of money to achieve that good sound quality.
Immediately we noticed that the boomy bass from the stock subwoofers was now pleasantly balanced out and complimenting the full range of our new speakers. With our BavSound Stage One Speaker Upgrade, we now had:
Detailed, smooth and clear top end – voices were crisp and detailed, yet silky smooth.
Warm, clear and natural mid range – the muddiness was completely gone.
Additional output – these speakers are very efficient, playing much louder than the original stock speakers, yet they blended beautifully with the existing stock rear speakers and stock subwoofers.
Additionally, these speakers didn’t have any hint of harshness to them which is something I’m always concerned about whenever replacing stock speakers without also upgrading the source unit and/or amplifier. The BavSound speakers are incredibly impressive. So much so that I’ve changed my audio upgrade approach to BMWs.
Ready to upgrade your BMW audio system?
If you own a BMW and are interested in upgrading your audio system – without breaking the bank or tying up your car in the shop for days – you will appreciate the audio transformation achieved with the simple BavSound Stage One Upgrade.
The only other thing I would add to compliment the BavSound Stage One Upgrade is what I call a real subwoofer, something to add true depth and deep, punchy bass. Luckily, the folks over at BavSound agree and have a few Ghost Subwoofer options of their own available for select BMW’s.
If you’re ready to upgrade your BMW audio system, head over to BavSound.com and find out what it will take to upgrade your BMW audio system.
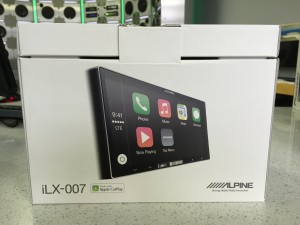
Alpine iLX-007 – The packaging led us to believe wireless CarPlay was coming.
When Alpine first announced the iLX-007 in September 2014, everyone seemed to notice the “Wifi Enabled” feature displayed on the packaging and press release. There was very little information from Alpine at the time other than an assumption that the currently useless feature would eventually lead to a wireless version of Apple CarPlay.
However, if and when that would ever happen was anyone’s guess. It seemed to be a decision that was at the hands of Apple. Yet, just last week at Apple’s Worldwide Developers Conference an announcement was made that CarPlay was going wireless. So where does this leave Alpine iLX users?
One my readers from Europe received this rather disheartening response from Alpine UK regarding wireless CarPlay on the iLX-700. With the announcement that iOS9 would contain wireless CarPlay ability, Paul emailed Alpine UK asking if there would be an update. Here was the response he received:
“From: AOUK Gait Date: 10 June 2015 08:07:23 BST To: Paul Subject: Re: Fwd: iLX-700 Good Morning Paul
I’m afraid not, the Wifi Chip was only in the first production units and is no longer in the ILX-700, this feature will not be possible on the ILX-700
Regards”
Well, I can’t speak for what Alpine is doing in the UK, but I did speak with my Alpine rep regarding the iLX-007 and here is what he knew about the situation. His understanding is that Apple changed the wireless CarPlay protocol after Alpine already built in the WiFi feature. So the rumor here is that you need to have both Bluetooth AND Wifi to make Apple CarPlay work wirelessly. The other tidbit of information he gave me is that Alpine didn’t stop building WiFi into the iLX-007, they just stopped listing the feature on the box until they figured out what Apple was doing. I’m wondering if the response Paul got was just some corporate BS reply.
I’ve been told that Alpine is coming up with a solution and it will most likely be a Bluetooth dongle that connects to the USB which will add the Bluetooth necessary for wireless CarPlay. I assume there will probably also be a software update for the unit too. There is no ETA on this Wireless CarPlay dongle at this time. Additionally, I wonder if Pioneer will follow suit and create a USB WiFi dongle to allow wireless CarPlay with their models.
Either way, I think wireless CarPlay will be a huge hit. When I show a customer Apple CarPlay for the first time, that is the first question they always have, “Does it have to be connected?”. Apparently we all want everything to work wirelessly. Once Alpine figures it out, I think wireless CarPlay will be a huge hit.
This week in the shop we installed an Alpine X008U with Alpine’s KTX-ESD8 dash kit in a 2010 Cadillac Escalade.
The OEM 2007 – 2014 Cadillac Escalade navigation systems are known for being problematic. Screens blacking out, loss of GPS signal and “MAP DVD Read Error” messages are just a few of the common problems, but consumers who go to their dealer may be shocked to find out a new OEM navigation system goes for $2495 plus install. Yikes. Alpine saw this as an opportunity to develop a pretty sweet Cadillac Escalade dash kit. You may recall seeing the Alpine Cadillac Escalade dash kit from my Alpine CES 2015 coverage.
Alpine KTX-ESD8 Cadillac Dash Kit shown at CES 2015 with Alpine X008U
Compared to other aftermarket navigation options on the market, the Alpine X008U is really the only smart choice. Take a look at where Metra places the stereo in their Cadillac Escalade dash kit:
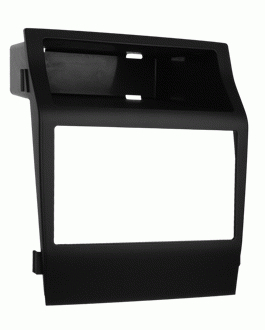
Metra Cadillac Escalade Navigation Kit
And remember this is what the car looked like from the factory:
Cadillac Escalade Navigation Dash
Why Metra designed a dash kit that lowers the position of the touch screen is beyond me. They did the same thing with the 2013 – up Ford F-150 dash kit. I wouldn’t recommend that to any customer. People are distracted enough as it is with technology while driving. I really don’t want to encourage them to look down any more than they have to. By the way if you have a 2013 up Ford F-150 with the 4.3″ My Ford radio check out iDatalink’s new K150 dash kit here.
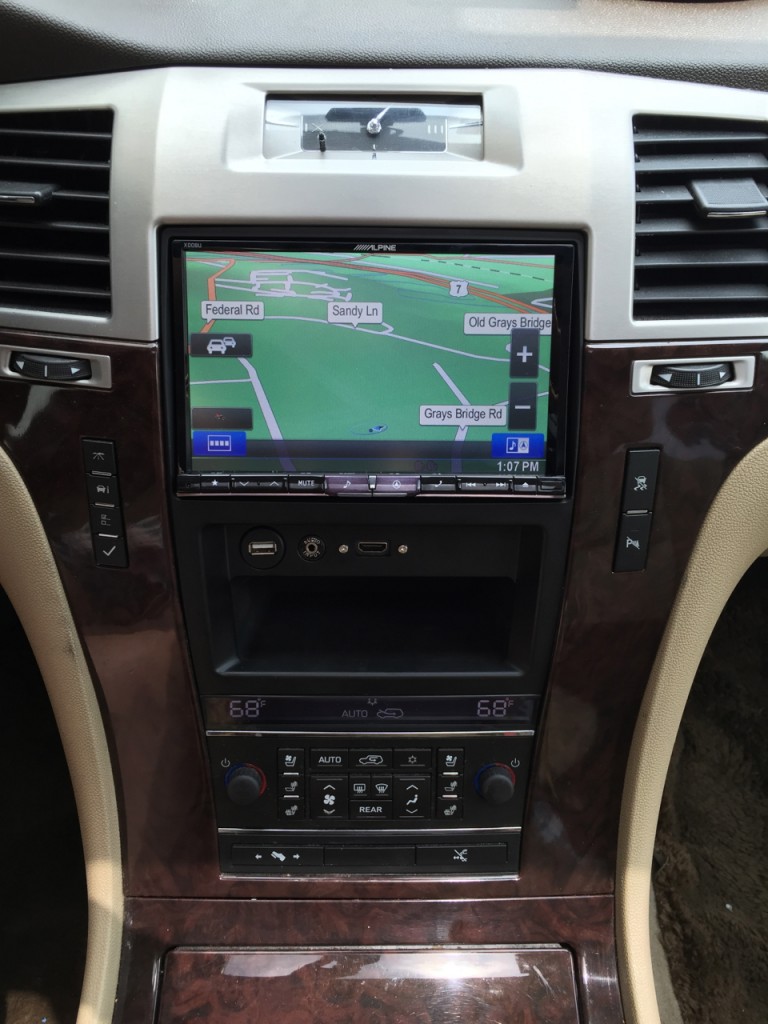
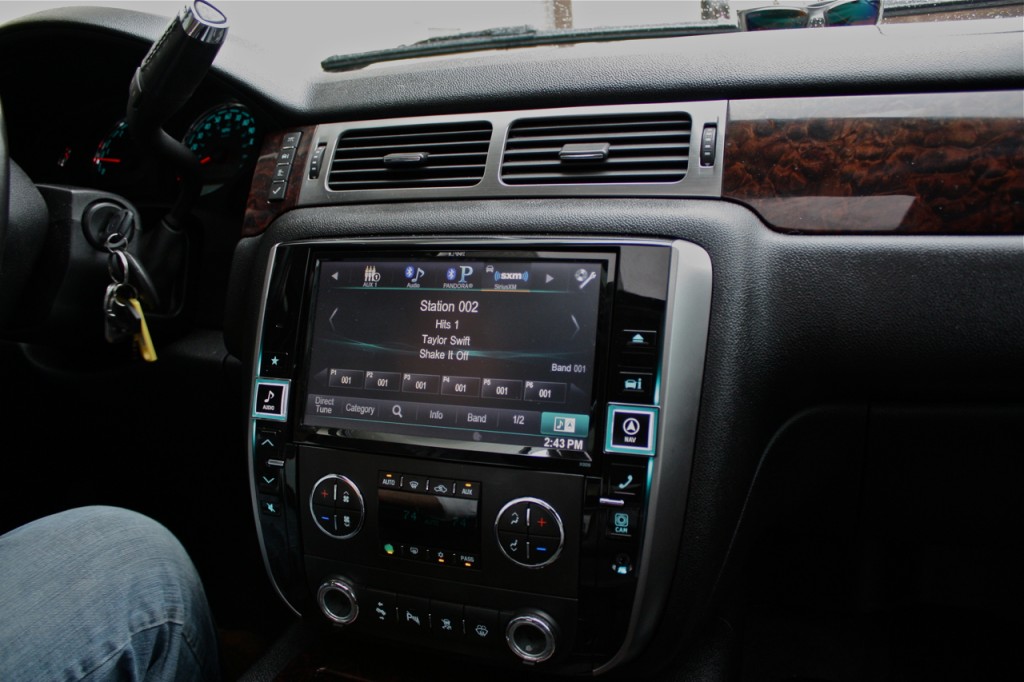
The point is, if you have a 2007 – 2014 Cadillac Escalade and your stock navigation system has crapped out, the Alpine X008U and KTX-ESD8 kit is the best aftermarket solution for your vehicle at this time. I wouldn’t feel good about selling another product to replace the Cadillac Escalade navigation system. The 8″ Alpine X008U fits perfectly in the dash and ships with almost everything you need. Take a peak:
Alpine X008U installed in Cadillac Escalade with KTX-ESD8 dash kit
The dash kit is OEM fit and finish and includes the flush mounted USB, AUX and HDMI inputs. It also includes a Pac Audio interface to retain things like steering wheel controls, rear seat entertainment, Onstar, reverse camera and factory SiriusXM radio.
This is my only complaint.
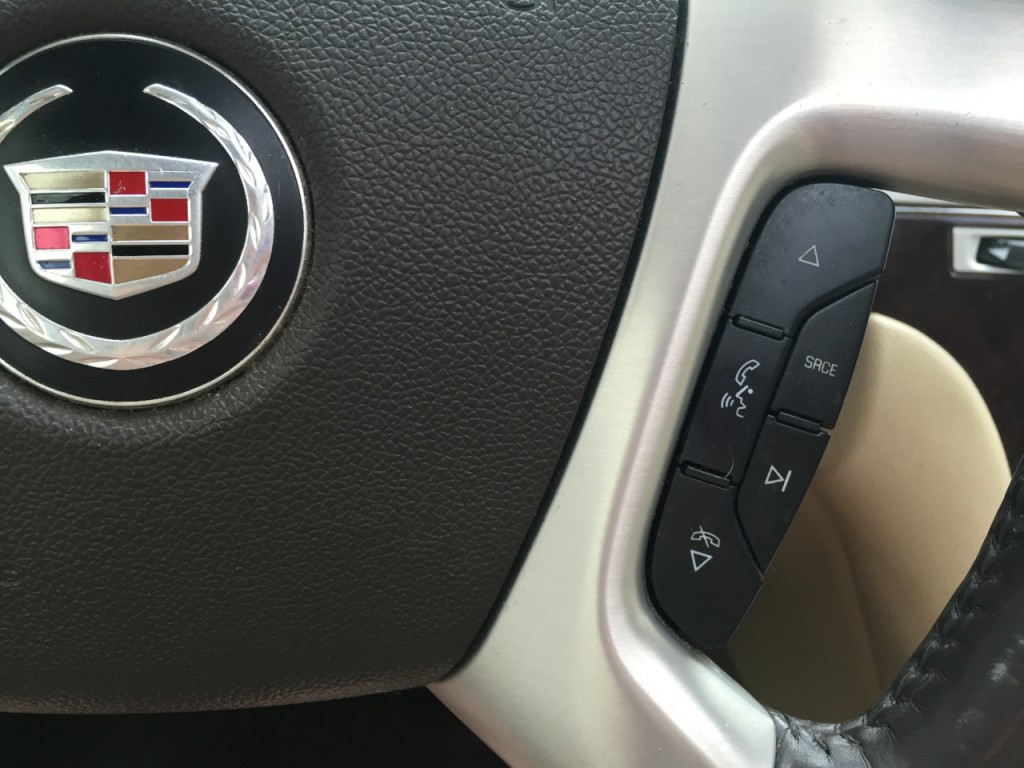
For the customer with SiriusXM, that really likes and uses SiriusXM, it’s worth it to pay extra for the iDatalink Maestro interface. Here’s why. To access the factory SiriusXM using the Pac Audio interface you have to select AUX on the radio as your source (which means that flush mount AUX really isn’t functional because we’re using it for factory SiriusXM retention) and then you have to press and hold the “Source” button on the steering wheel to enable SiriusXM control.
Retaining SiriusXM with aftermarket stereo using Pac Audio
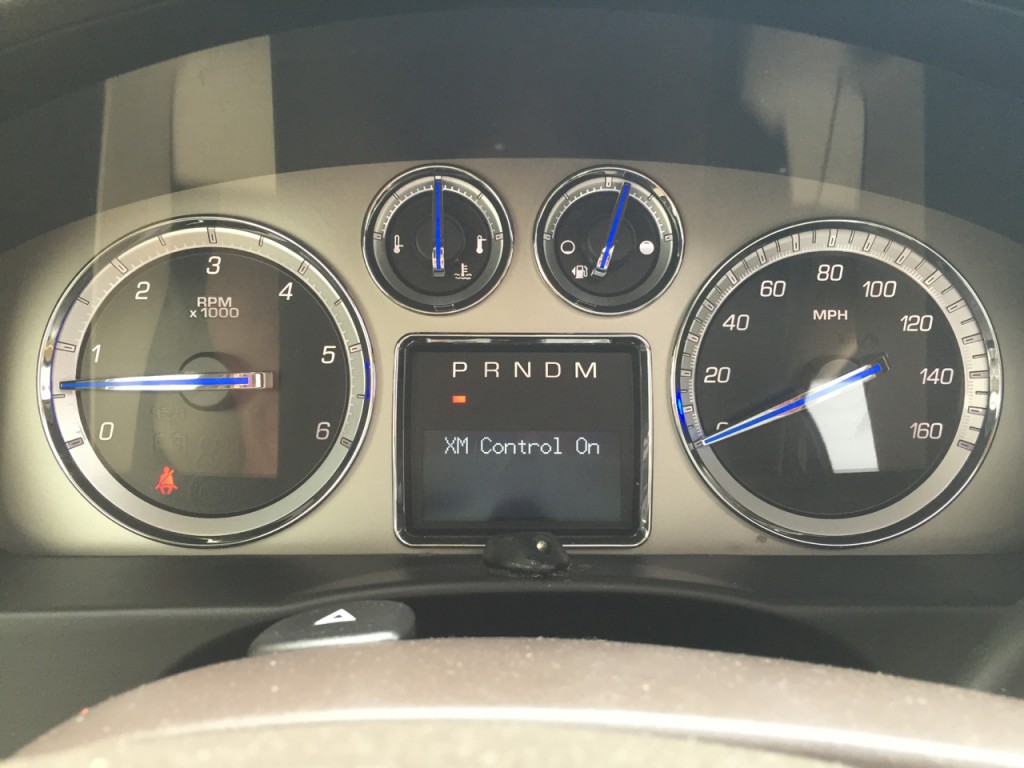
Once you press and hold Source on the steering wheel controls you will hear a beep and see this pop up on your instrument cluster:
Retaining SiriusXM with Cadillac Escalade kit KTX-ESD8
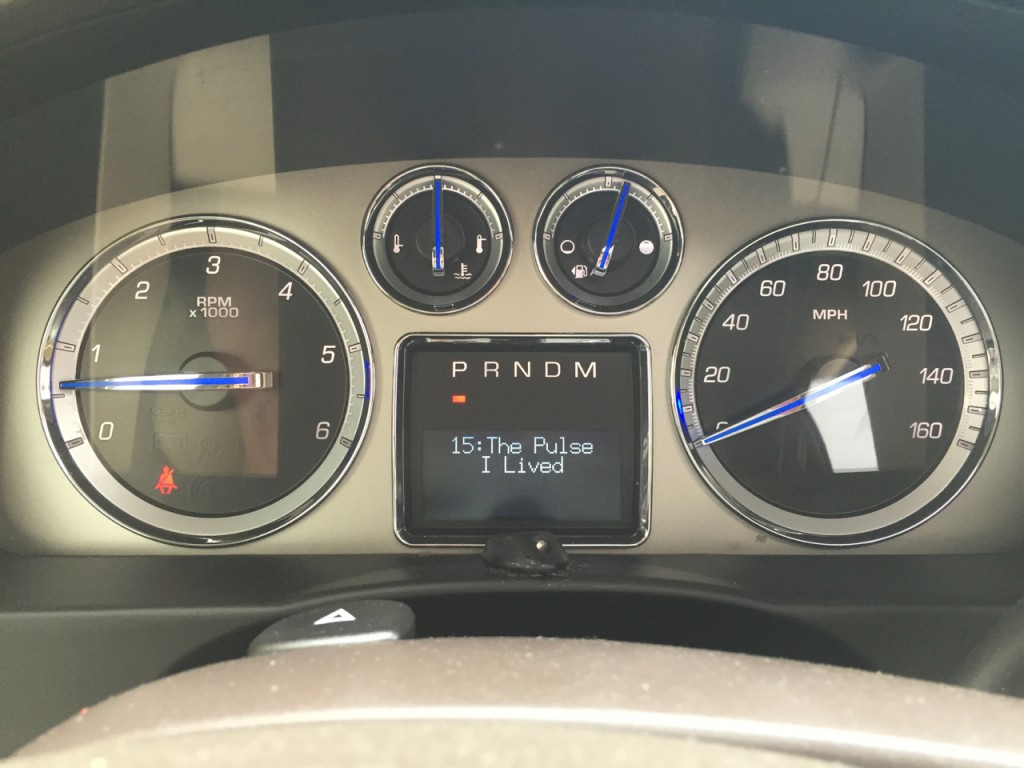
Then you can use your steering wheel controls to scroll through channels and presets. Your only display for SiriusXM is that instrument cluster display. All the while your $2100 Alpine stereo is displaying nothing other than “AUX” on it’s big beautiful 8″ touch screen.
SiriusXM retained Cadillac Escalade Alpine X008U and KTX-ESD8
It’s definitely a bit confusing. It took me more than a couple minutes to figure out even after reading the instructions. After teaching it to the customer he opted to have us install the SXV300 SiriusXM tuner that would actually show up and be controlled on the Alpine X008U. All in all, I would have preferred to use the iDatalink Maestro interface and AVGM5 harness.
Alpine – Why didn’t you just include the iDatalink Maestro with your KTX-ESD8 Cadillac Escalade kit?
The iDatalink interface provides much better SiriusXM retention as it allows you on screen control and access of SiriusXM. Alpine ships this interface with some of their other Restyle kits so I really don’t know why they cheaped out on their Cadillac Escalade kit.
if Alpine would package this kit with the Maestro RR and AVGM5 then the Alpine X008U would display all of this SiriusXM information on screen:
Meta Data Display
Recall Presets
Store Presets
Direct Tuning
Channel Guide
Category Guide
Category Seek
Additionally, the iDatalink Maestro RR retains the park assist distance display on screen. The included Pac Audio interface just retains the audible warning chimes. Other cool perks of the iDatalink Maestro include vehicle information like:
Tire Pressure Monitor Display
Battery Voltage Display
Read and Reset Check Engine Codes
Door Open Status and Warning
User Selectable Gauges
Here’s what the SiriusXM control would look like if you used the iDatalink Maestro interface.
Alpine includes the iDatalink Maestro module in their X009-GM kit shown here.
Some of you may be wondering why I keep harping about the SiriusXM retention considering how I truly feel about SiriusXM, but at the end of the day I care mostly about my customer’s experience and I feel it’s in Alpine’s best interest to dump the Pac Audio interface and include the iDatalink module. Dealer cost and consumer retail are pretty much the same so I’m really not sure what their reasoning is behind it.
Have you installed the Alpine X008U in your Cadillac Escalade? What do you think of this Cadillac navigation replacement?
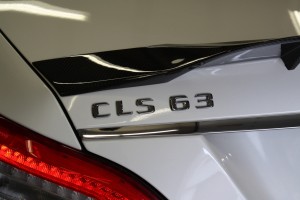
In the shop this week – Mercedes CLS 63 – Stealth K40 Radar Detector and Stealth Custom Subwoofer
This week in the shop we had the pleasure of working on a client’s 2014 Mercedes CLS AMG. For this vehicle, our task was to install both a K40 radar and laser system as well as fabricate a stealth custom subwoofer enclosure. We had previously installed a JL Audio amp and subwoofer over the Winter, however the enclosure was pretty big and took up a large portion of the trunk. Like most consumers, this client wanted the benefits of an amp and sub, but he didn’t really want to see it.
K40 radar and laser systems are usually pretty stealth as it is, but for this particular Mercedes we took integration and stealthiness to the next level by installing a Mid City Engineering K40 instrument cluster interface. This interface eliminates the need for the K40 LED indicator lights and instead displays warnings in the instrument cluster of the vehicle.
Aside from the K40 system and stealth custom sub install, we had one other task to accomplish. We planned to do a frequency sweep to investigate an inherent rattle that was baffling Mercedes engineers. Prior to us working on this vehicle, the client had been experiencing an annoying and inconsistent rattle coming from the rear shelf. After several failed attempts to identify and eliminate this rattle, the dealership called in Mercedes engineers who also failed to identify and repair the problem. A frequency sweep would be the easiest way to reproduce the rattle, identify where it was coming from and then repair it.
John focused on the K40 installation first. We sell and install and lot of K40 systems at our shop. There are several combined reasons for why we love the K40 systems.
Performance
Reliability (Funny side story – I can’t remember the last time I had a defective K40 product – On the other hand I sent out an Escort system for repair back in December. Turn around time for Escort is usually 6-8 weeks. This time they lost the parts and kept giving me the run around every time I tried to follow up. I finally just received it this week only to find out they sent back the wrong laser shifters. Consider reliability and customer service when choosing your Radar system.)
Discreetness
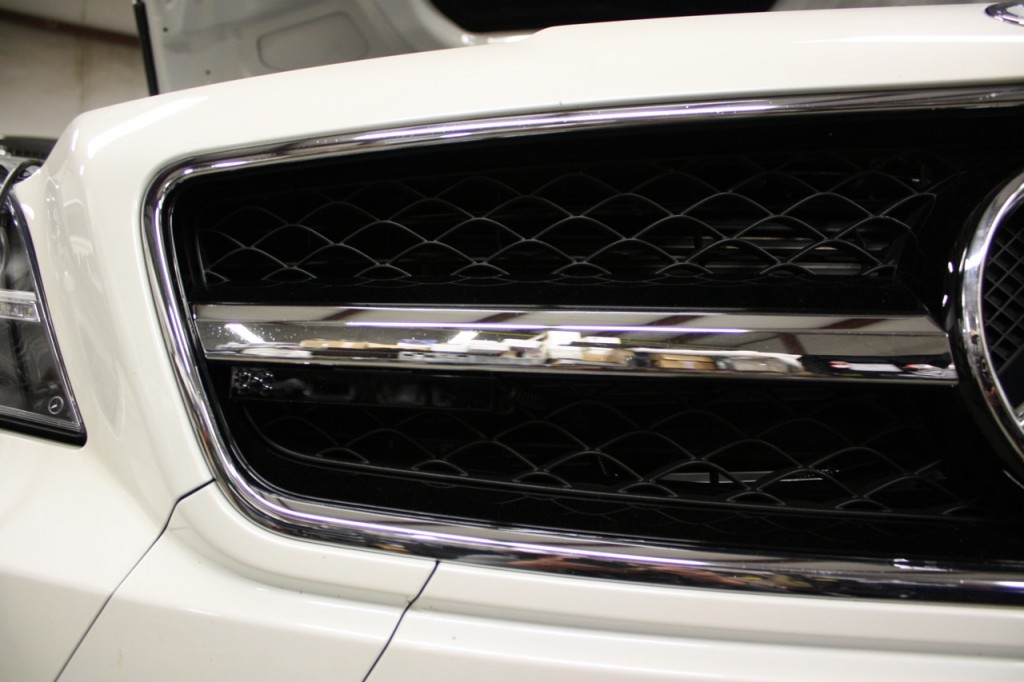
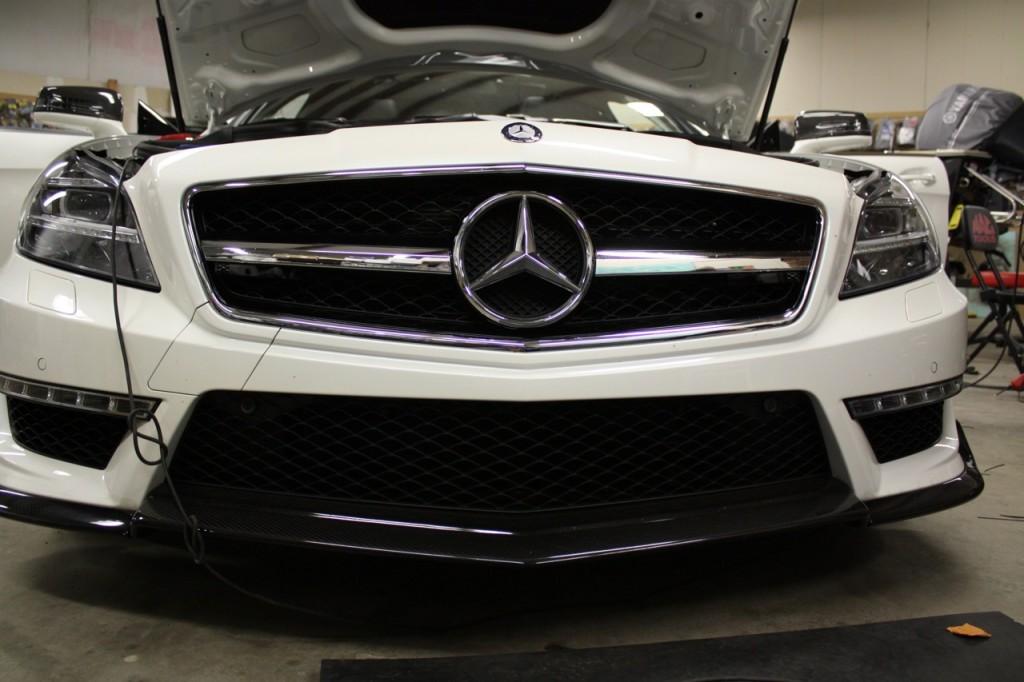
Exterior discreetness will be the same from brand to brand as most companies have radar receivers that can be hidden behind bumpers and laser shifters that are small enough to be blended into the vehicle’s front grill.
Mercedes CLS 63 AMG K40 Laser Install
When you step back from the vehicle you really can’t see the left and right laser shifters. They really kind of blend into the front grill.
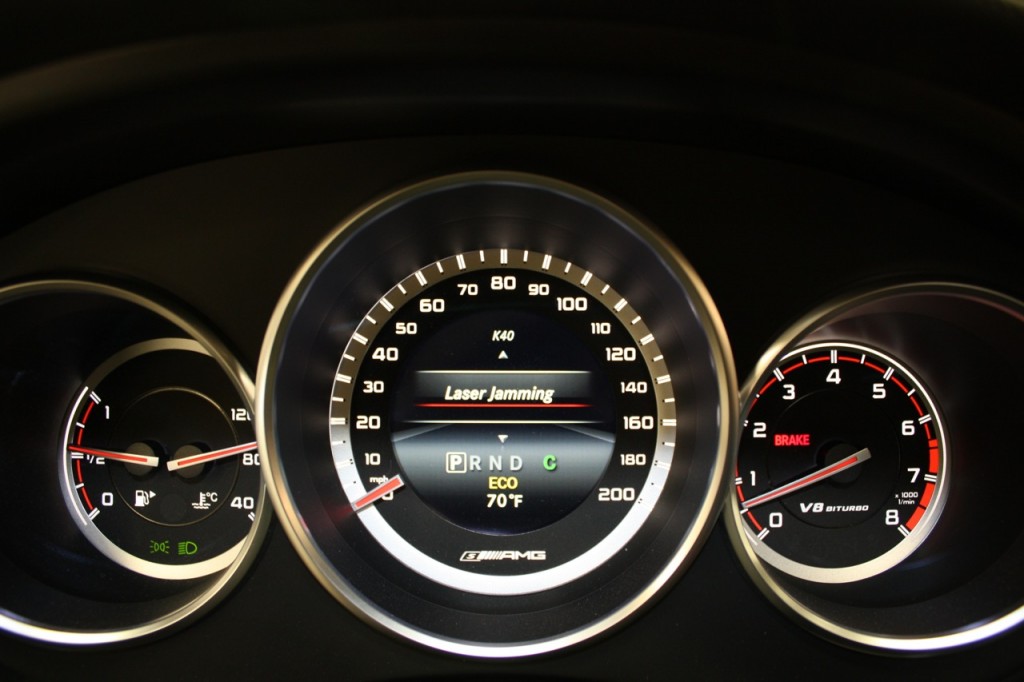
The coolest part about this install is what you see inside. Normally with K40 you have two small LED indicator lights as your display. One indicates for front, one indicates for rear. Additionally, there is a hidden speaker that announces the alerts and a wireless remote control to change settings and turn the system on and off. For an even more discreet and integrated installation, we installed a Mid City Engineering K40 instrument cluster interface. Check out how freaking cool this is.
K40 Mercedes Instrument Cluster Interface
No LED’s are needed with this setup, your display is right in front of you integrated into your factory instrument cluster. Mid City Engineering has a few different models listed on their website, but give them a call if you don’t see your application listed.
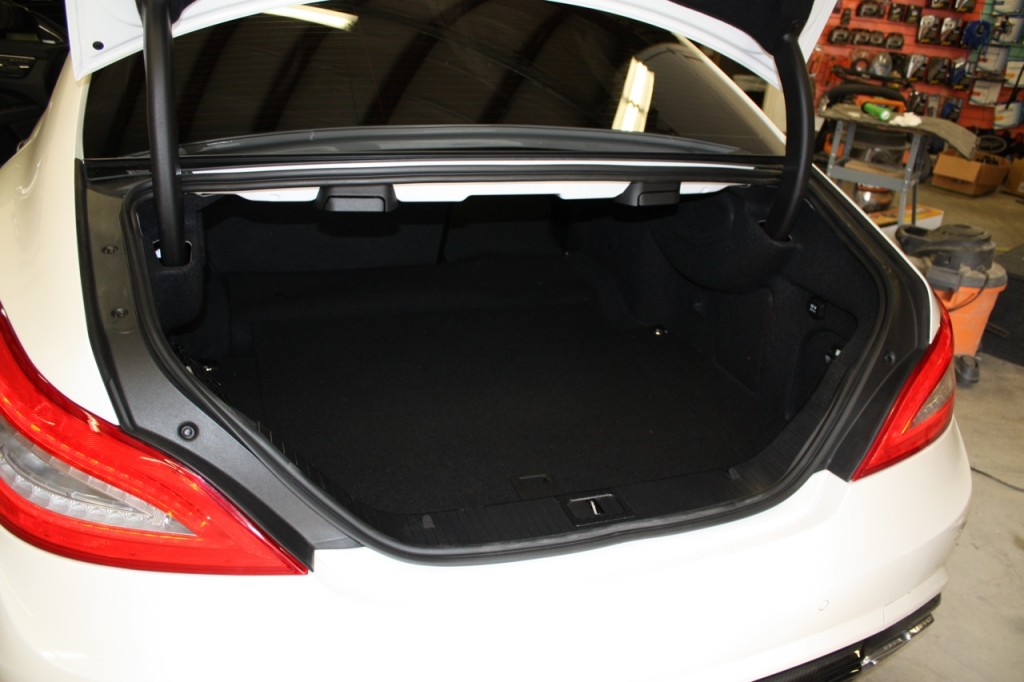
Mercedes CLS AMG Stealth Sub – Factory Trunk Appearance
Check out this trunk. Would you believe we’ve got a 12″ W6V3 subwoofer enclosure in there?
Mercedes CLS AMG Stealth Custom Sub Install
Looks pretty stock, right?
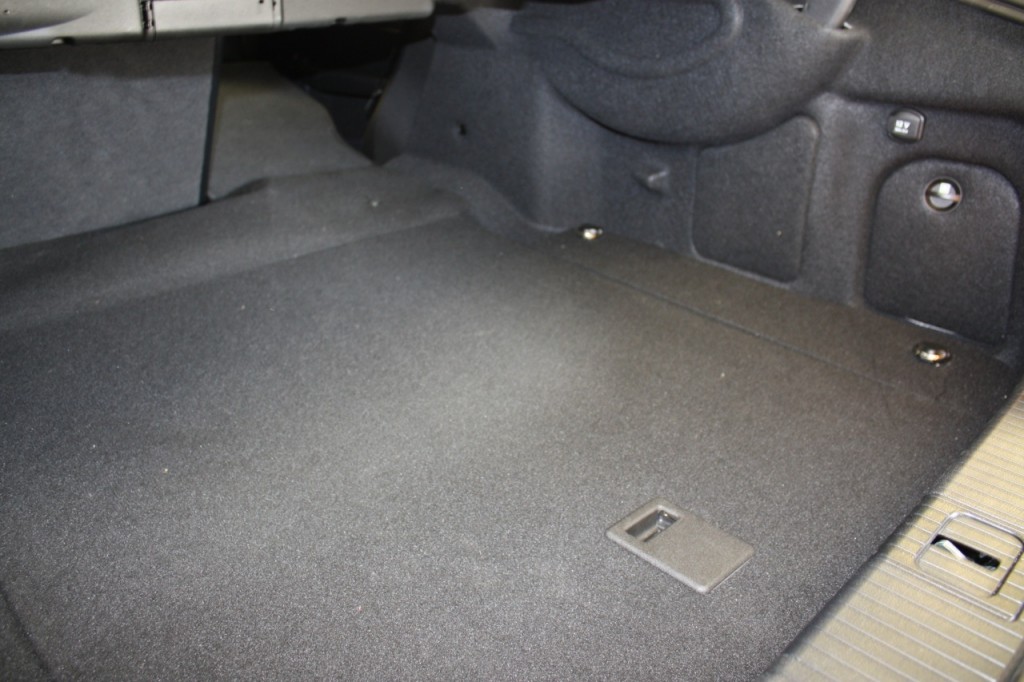
Mercedes CLS AMG Stealth Custom Sub Install
Disclaimer – We did sacrifice the inflate a spare to accomplish this.
Mercedes CLS AMG Stealth Custom Sub Install
John built a down-firing sealed enclosure for the 12W6V3 and remade the entire trunk floor as it needed to be raised up 3/4″. He removed the factory hardware from the original trunk-liner and attached it to his newly fabricated trunk-liner.
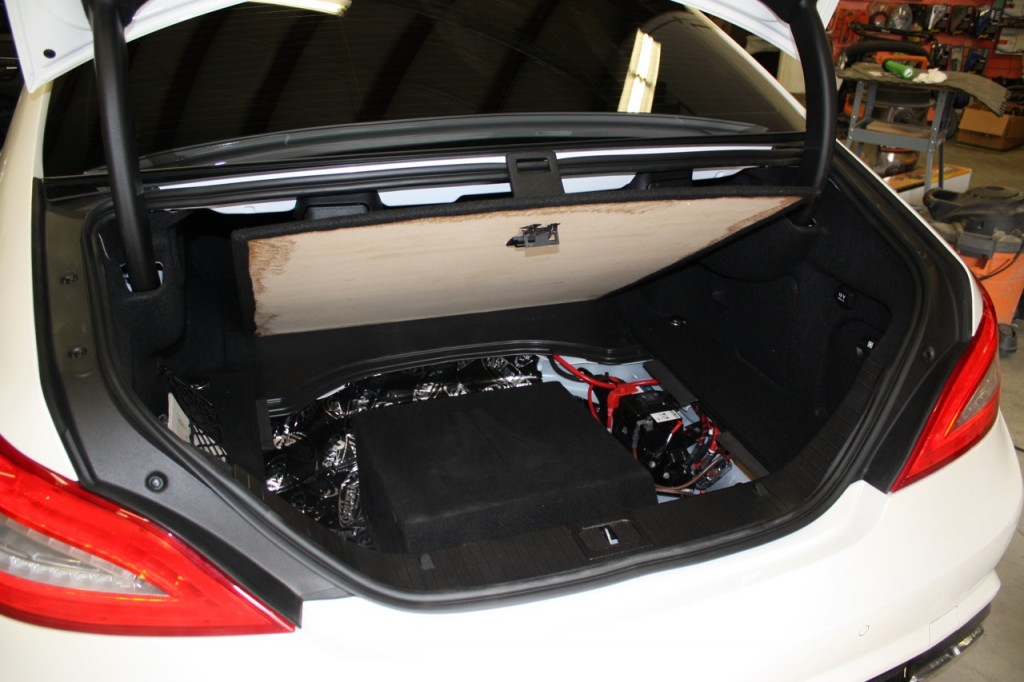
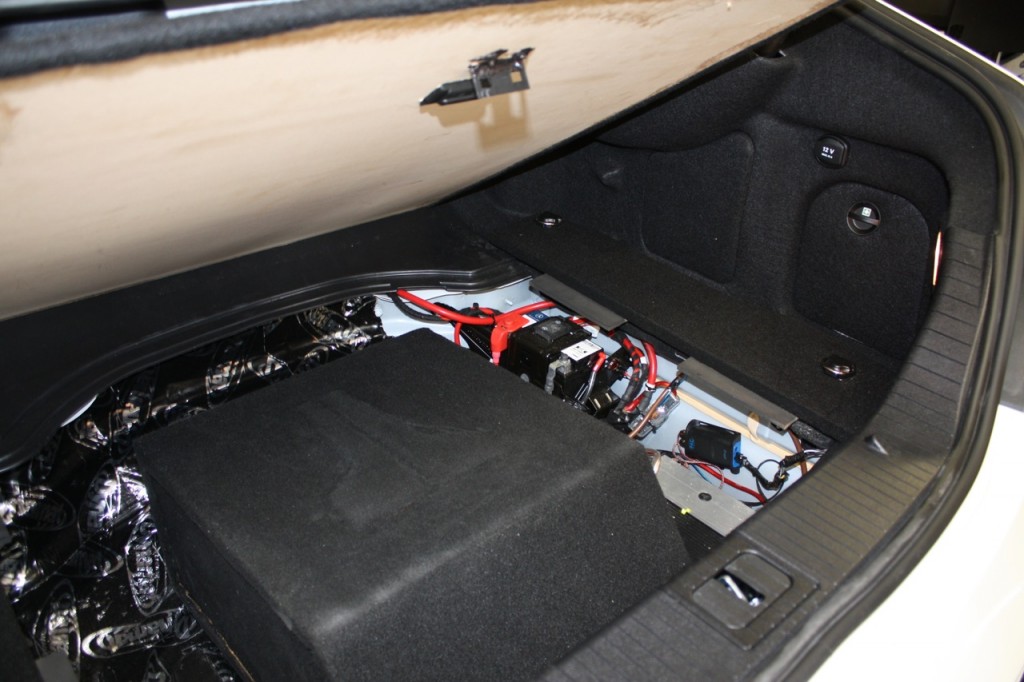
Mercedes CLS AMG Stealth Custom Sub Install
He also dynamatted the entire trunk well while he was in there.
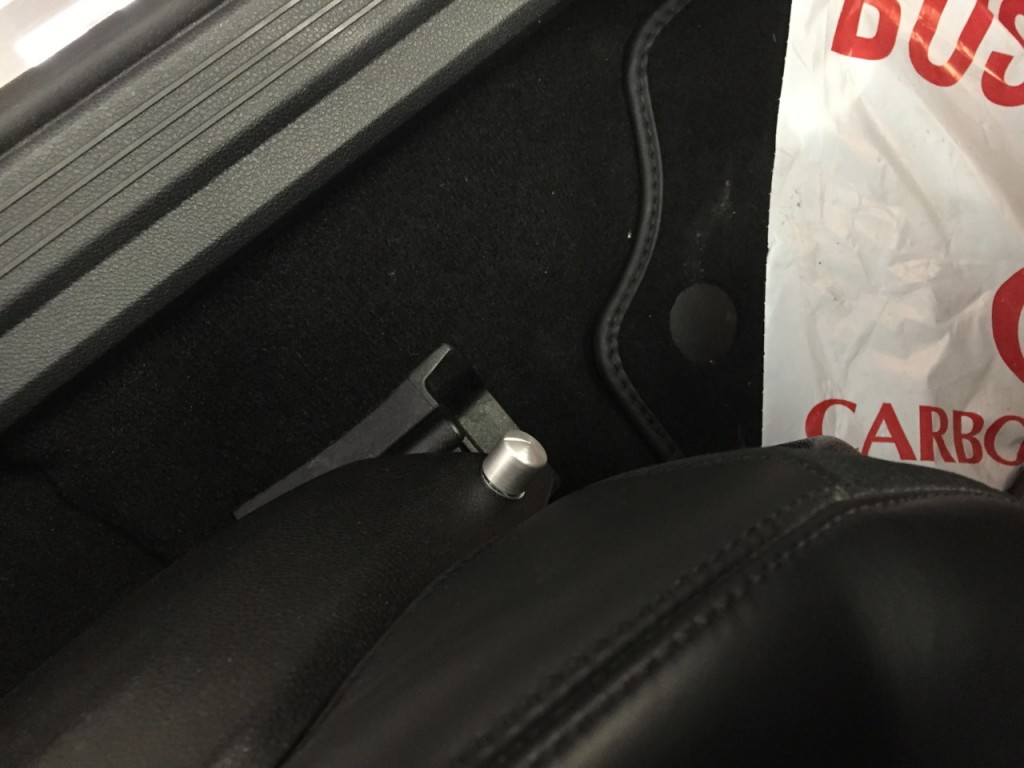
Mercedes CLS AMG Stealth Custom Sub Install
The JL symbol on the top of the box is a foam inlay he made before carpeting the enclosure. Whenever adding an amp and subwoofer to a factory installed audio system, it’s always a good idea to install a bass knob or subwoofer control knob. In this particular vehicle, John mounted it towards the bottom left side of the driver’s seat panel. It’s discreet, yet easy to access.
To identify the rattle that eluded Mercedes engineers, John played a frequency sweep and then listened and located the rattle in the rear shelf. The culprit was a control box mounted on top of the deck lid bolted from the bottom. Even though it was securely mounted, it needed sound dampening material underneath it.
This was a thorough and meticulous installation designed to be discreet without sacrificing performance. This vehicle now sounds fantastic and has the added benefit of radar and laser protection, yet you’d never know it from appearances. If you’re in the vicinity of Brookfield, CT (Fairfield County) and in need of a polished and discreet installation for your vehicle, contact us today to see what options are available.
This week in the shop – 2005 Porsche Cayenne, Pioneer AVIC-8100NEX and Murphy’s Law.
Well, it was more like 2 weeks ago in the shop I had the pleasure of doing an installation for a reader who graciously made the 2 1/2 hour trek from Boston to our shop in Brookfield, CT. Raj has experience in the tech and infotainment industry and he was just as excited about seeing Android Auto in action as I was.
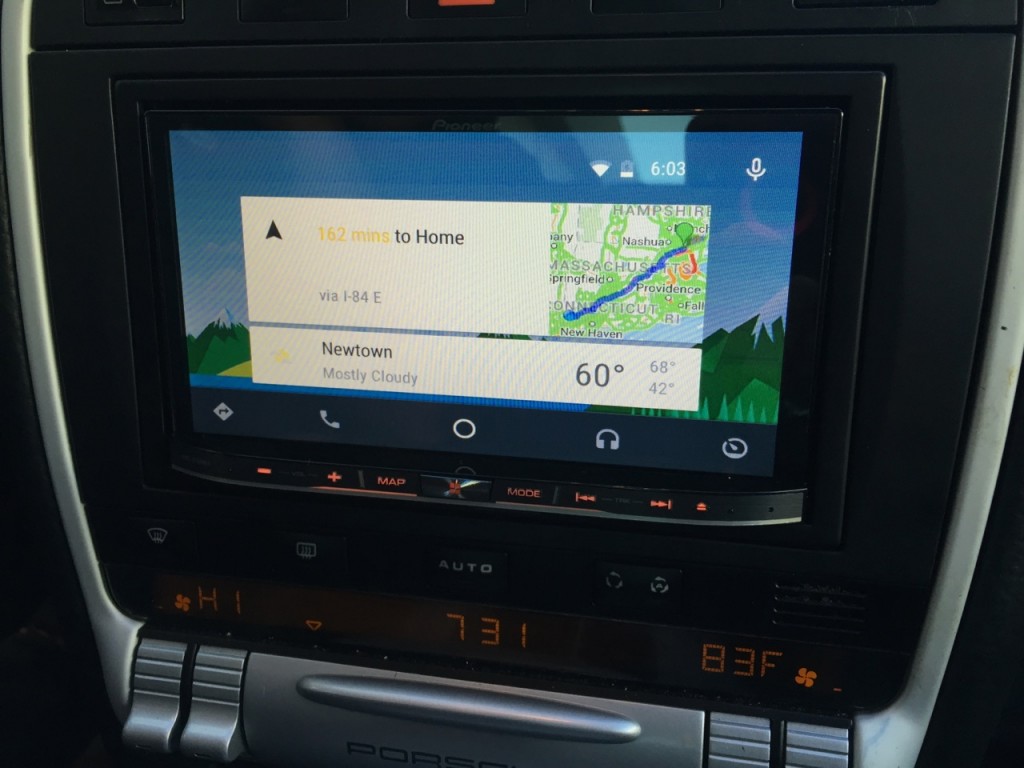
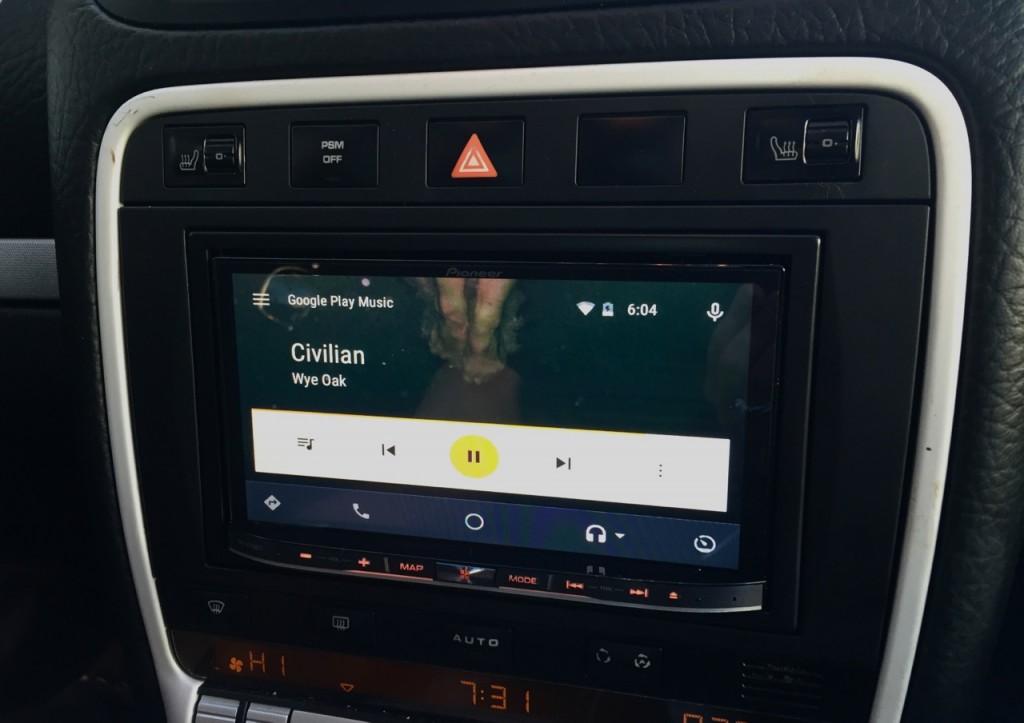
Porsche Cayenne Navigation Upgrade – Android Auto
He was seeking an upgrade for his 2005 Porsche Cayenne navigation radio and was leaning towards the Pioneer AVIC-8100NEX. This model appealed to him because of its Android Auto and Apple CarPlay compatibility. Additionally, it features on board navigation and a capacitive touch screen, much like the capacitive touch screen used on many smartphones.
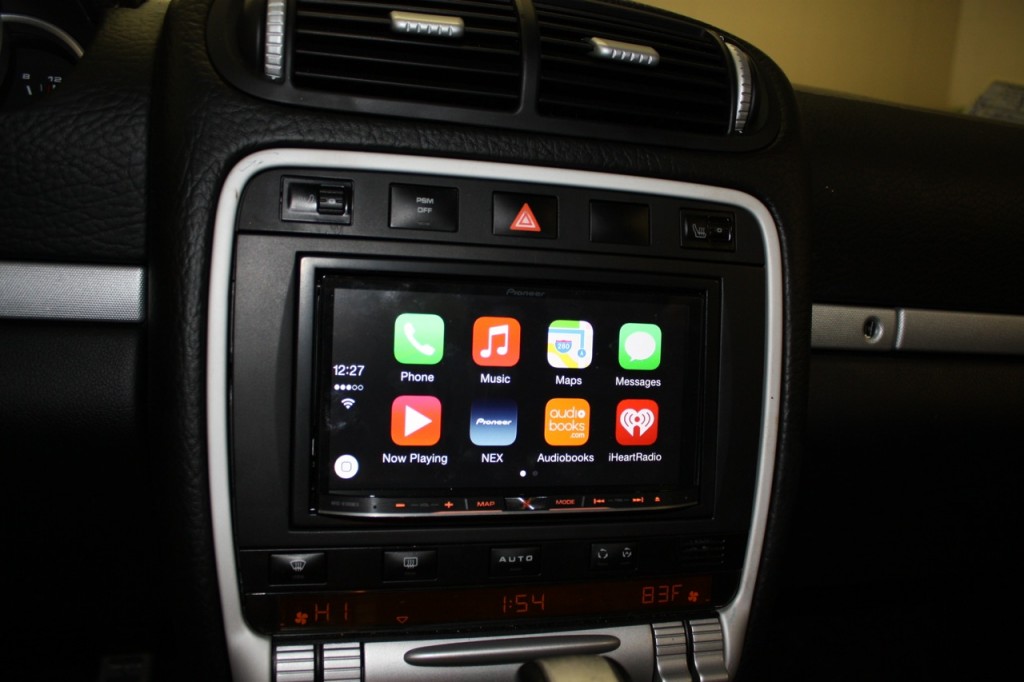
Porsche Cayenne Navigation Upgrade – Apple CarPlay
I had some reservations about doing an install for a client driving all the way down from Boston. Only a few weeks prior, we had another customer down from the Boston area with a BMW E46 and we ran into some minor issues that were made much more difficult due to the logistics involved. It was late Friday afternoon. The vehicle was in the garage and the installation was in progress when we realized the dash kit company shipped us a 5 series double din kit in a 3 series E46 double din package. Hello Murphy! We were left with few options and very little time to remedy the situation. So, my husband John did what he could – pulled an all nighter and fabricated his own kit.
So, needless to say, I was a little hesitant about another Boston client coming down on a Friday for an installation. I thought to myself, “What could go wrong this time that would be difficult to remedy based on the customer’s place of residency?” John reassured me it was a lot more straightforward than the 3 series and there was a lot less that could go wrong. It was essentially a head unit install with some cables routed to the center console. Plus, he reminded me we would be using tried and tested Nav TV parts. I convinced myself everything would be fine with this Porsche Cayenne navigation upgrade, but in the back of my mind I was still paranoid about what could go wrong when a client travels such a long distance for the purchase and installation of car electronics.
I’ve been alive long enough to know that Murphy is always lurking around, but let’s forget my paranoia for a moment. The Pioneer AVIC-8100NEX really was the perfect solution for bringing this 10 year old vehicle’s navigation system up to date. The goal was to replace the old outdated Porsche navigation radio with a capacitive touch screen navigation radio that supported both Apple CarPlay and Android Auto.
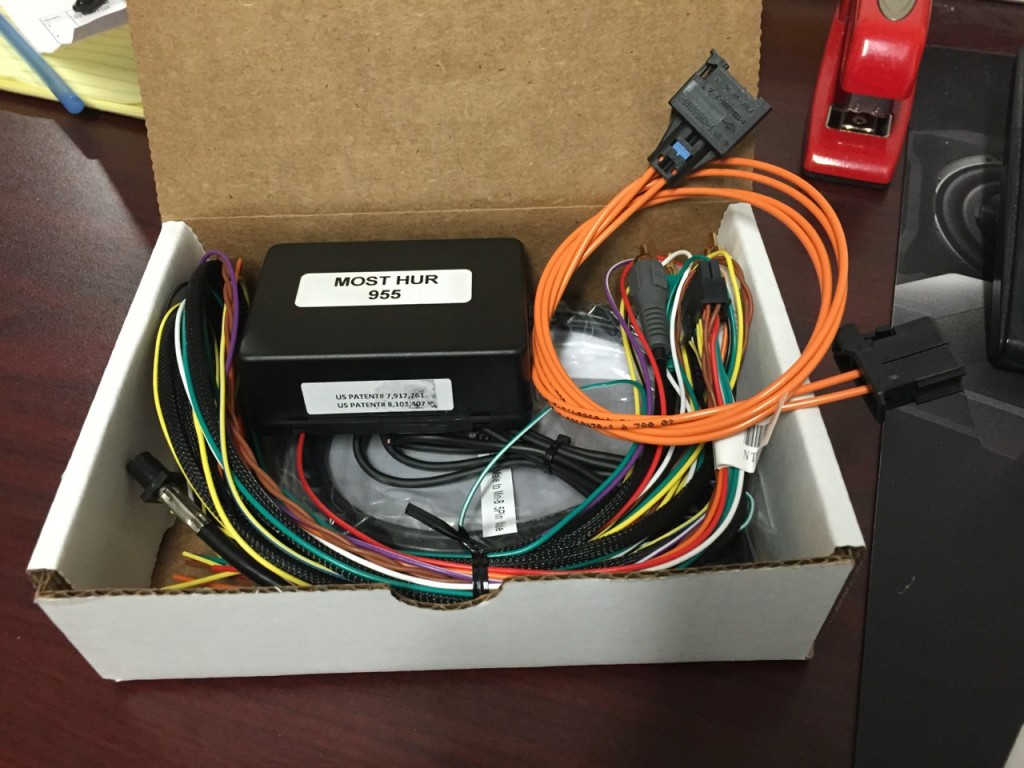
Even though the Porsche Cayenne was equipped with the fiber optic MOST Bose audio system, with the right parts, it was going to be a relatively straight forward job. Nav TV makes a pretty cool interface that allows you to retain the stock fiber optic Bose amp called the MOST HUR-955.
Porsche Cayenne Navigation Upgrade – MOST HUR 955 – And, yes, that’s my red swingline stapler in the background.
Having sold and installed several of these kits before, I wasn’t too worried about that part of the install. Besides the interface, there are several different dash kits available for this vehicle. Metra makes one and so does Nav TV. We used Metra’s ASWC-1 steering wheel control interface and Nav TV dash kit. Although the Nav TV Porsche dash kit is more expensive than the Metra version, it is made in Germany and has the same exact appearance, quality, texture and finish as the factory radio.
Shortly after Raj first inquired about the 2005 Porsche Cayenne navigation upgrade, we touched base on the phone to go over details. I quickly typed up an estimate that he agreed to. With an install date set, I started ordering in parts.
This is when Murphy made his first appearance in our 2005 Porsche Cayenne navigation upgrade. After taking a deposit and ordering up parts I realized I made a pretty big mistake. Although I told him about the Nav TV MOST HUR-955 – I explained to him what it was and how it worked – I umm, sort of somehow forgot to put it on the estimate and subsequent invoice. Yikes! Talk about an expensive error. Unable to absorb that additional cost, I made the phone call to explain the error I made in my estimate.
I didn’t know what to expect. I would be pretty peeved if someone sprung an additional $600 part onto my estimate, but Raj was quite understanding and still wanted to move forward with the job. Sweet! I was excited. This was going to be our first install with a customer who actually had a compatible Android Auto device, the Google Nexus 6.
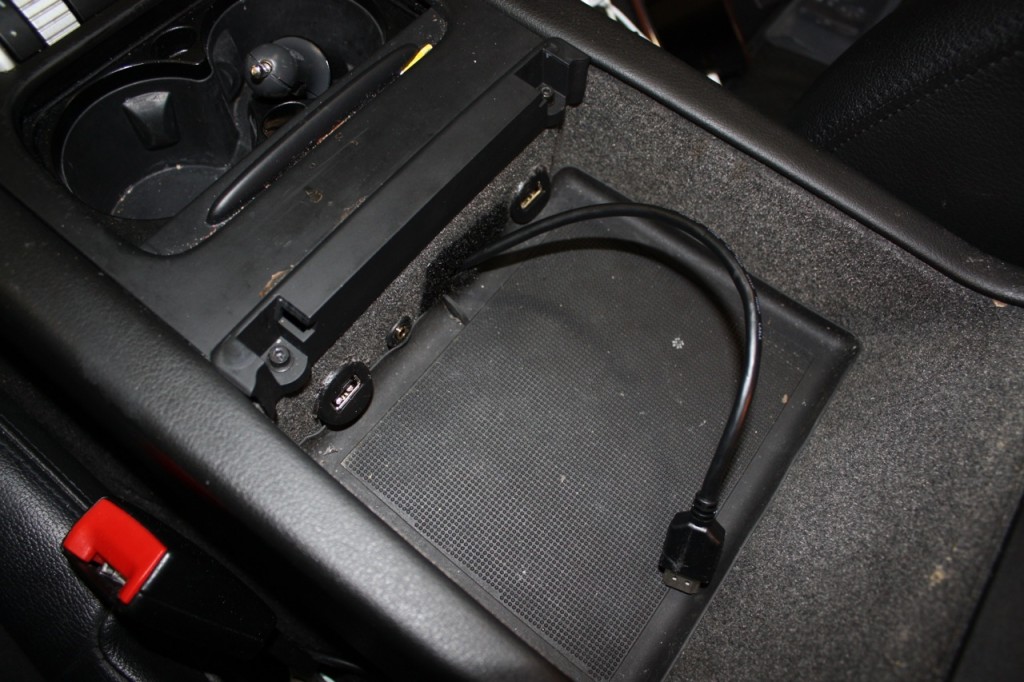
The Pioneer AVIC-8100NEX comes with two USB ports. USB 1 for Apple CarPlay and USB 2 for Android Auto. Additional inputs include HDMI and AUX. We planned to route all 4 into the center console for the 2005 Porsche Cayenne.
Porsche Cayenne Navigation Upgrade – USB’s Center Console
Everything with the installation was going as planned until about 4:00 in the afternoon, right about when John would have been wrapping things up. Uh-oh – here comes Murphy again! With the radio powered up and the interface wired in we had no audio. John removed the Nav TV interface and tried to do a software update. It was not recognized by our computer.
John spent over an hour testing and checking while on the phone with Nav TV tech support. Meanwhile, I had a major meltdown realizing we had been shipped a bum part. After explaining the situation to Nav TV (“You know, the customer is not from our area and can’t just pop back in Monday after you ship us a new part”) they managed to ship a replacement part out next day Saturday delivery which I’m sure cost them a pretty penny. We explained the situation to Raj and I drove him over to Enterprise to pick up a rental so he could drive home while we waited for the replacement part to arrive.
Raj was extremely understanding about the situation and he attributed this to being in the tech industry and having been in similar situations. On the way over to Enterprise he asked me, “So what was the part that was defective?” I responded, “It was that $650 part that I forgot to put on your receipt.” He burst out laughing. I’m glad he thought it was funny, he handled the news much better than I had.
The next day UPS arrived at 9 AM with the replacement interface and it worked like a charm. I have had such a low defective rate with this manufacturer that I was really surprised to have a defective part. Nav TV makes nearly all of their parts right here in the USA and quality control tests each and every one before shipping. Thankfully they stand by their product and they were quick to make it right.
Porsche Cayenne Navigation Upgrade – Google Play Music
At the end of the (next) day we had a very happy customer with a pretty sweet 2005 Porsche Cayenne navigation upgrade. Raj, I hope you’re enjoying it!
Meet the Pioneer AVH-4100NEX – Forget best double din 2015, this model is quite possibly the best double din head unit EVER.
Pioneer really hit a home run this year. I think it’s pretty safe to say the Pioneer AVH-4100NEX is the best double din head unit of 2015. Lately, it’s all I sell at the shop. Customers are initially attracted to this model based largely on the great cell phone integration features. This unit is flexible in that it supports both Apple CarPlay and Android Auto. As of this writing, no other brand offers a model that does both.
Pioneer set it up in a pretty smart way. For two phone families (or the person who has an iPhone for personal use and Android for work), you can change a simple setting in the menu to switch between modes. Both devices can be connected at the same time as Apple users will connect to USB 1 and Android users will connect to USB 2. This unit is so jam packed with great, functional features. The only reason you’d want to move up in head unit is if you needed something with on board GPS.
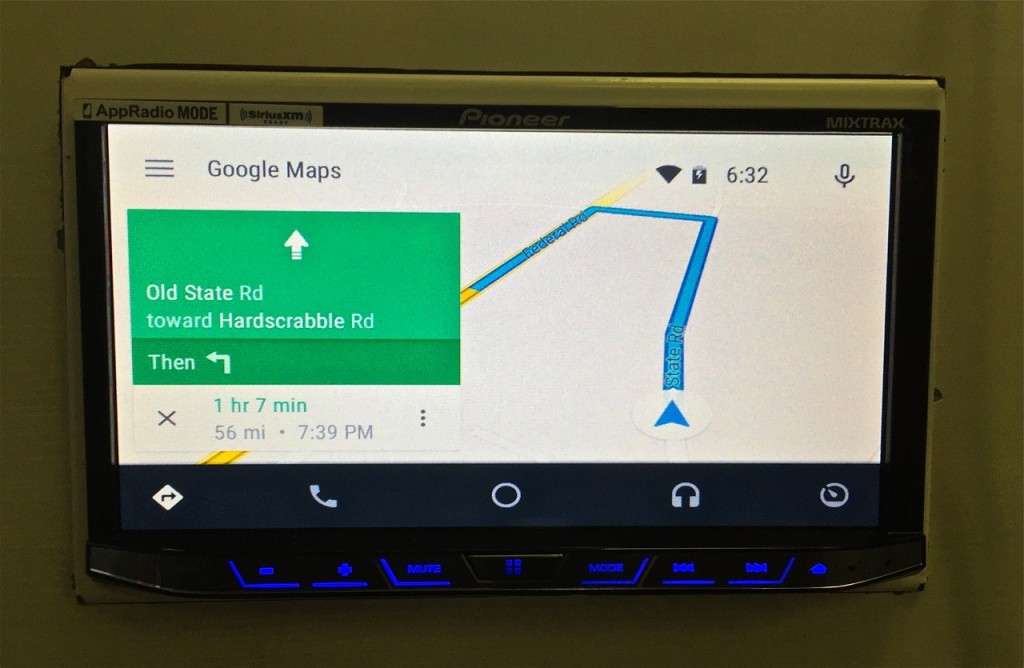
Google Maps using Android Auto on Pioneer AVH-4100NEX
With Apple CarPlay and Android Auto, you can effectively turn this head unit into a GPS unit – assuming you have cell service. That’s the only downside to these features. If you drive into areas that lack cell service, you lose these Android Auto and Apple CarPlay features because they rely on a cellular data connection from your phone. Depending on where you live and drive, this may not be a concern.
In our area, it’s not much of a concern for most. For the customers who really rely on GPS and drive into areas without cell service, they prefer to have on board GPS which works regardless of cell service. These folks usually step up to the AVIC-7100NEX or AVIC-8100NEX both of which have on board navigation in addition to Apple CarPlay and Android Auto.
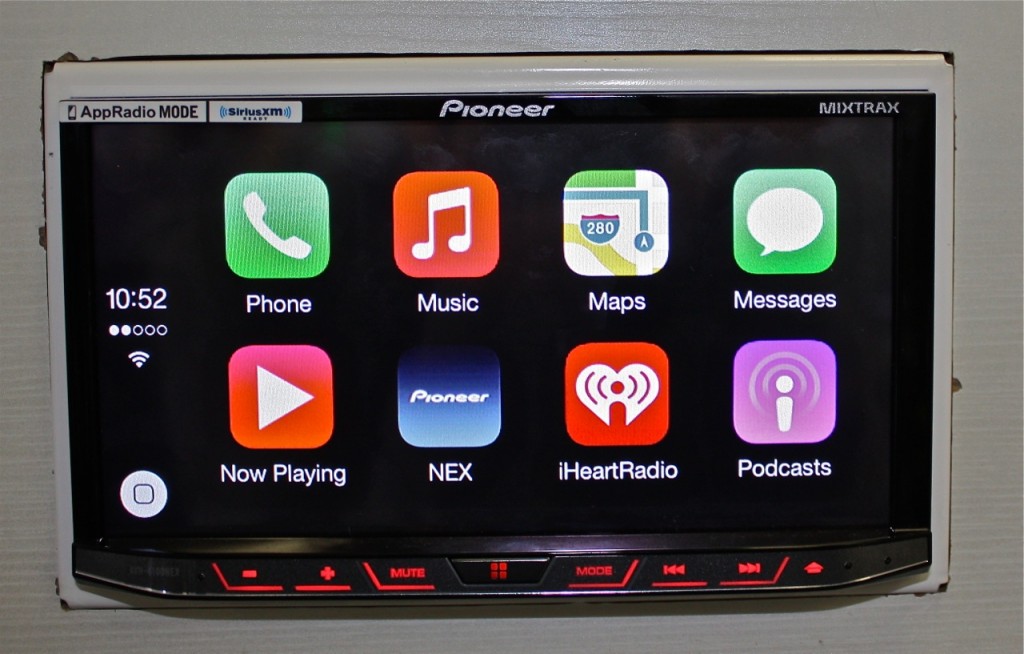
Apple CarPlay displayed on Pioneer AVH-4100NEX
Most people are sold on this stereo once I plug their phone in and they see the awesome integration ability of Apple CarPlay or Android Auto. However, aside from these two very popular and convenient interfaces, the AVH-4100NEX actually has a lot more to offer.
Disclaimer: Android Auto is supposed to work on all Android devices with Lollipop 5.0 and up, however I’ve had a few customers with Lollipop 5.0 where it was not yet functional including the Nexus 6 – I’m sure this will be resolved soon, but to really test functionality I recommend you try connecting your own phone in a showroom with a functional, up to date model. Apple CarPlay will only work with iPhone 5 and up. UPDATE 5/11/15 – Just tried with a customer’s Google Nexus 6 with Lollipop 5.1, worked no problem.
That’s a resistive touch screen? Really?
Yes, I’ve had tech savvy customers ask this upon first meeting the AVH-4100NEX because they can’t get over how bright and responsive the screen is. Although this is a resistive touch screen, it’s the best quality resistive touch screen I’ve seen (also used on all other 2015 NEX models except for the 8100 which uses a capacitive touch screen). It’s very bright, rich and responsive. It’s a huge improvement over last years models – not that they were bad, they’re just that much better. In fact, these new resistive touch screens are more responsive than the App Radio 4 which was released just last fall and features a capacitive touch screen.
Sound quality and audio control features galore!
So a few years ago I’d tell you Pioneer sounded like garbage and to never build a high fidelity audio system using a Pioneer double din. They were usually good with features, but they typically sounded muddy and lacked warmth, clarity, richness and detail. Thankfully, Pioneer really stepped up their game in the sound quality arena, most recently with their App Radio 4 and these sound quality features carry through to all the 2015 NEX models. I can’t say for sure that this unit sounds better than my Sony XAV-701HD. I have a feeling using an iPod or CD as a source, the Sony will still have the slight advantage. However, I’m sure the Pioneer will sound better playing FLAC audio files because – oh, yeah, it can play FLAC audio and guess what, my Sony can’t.
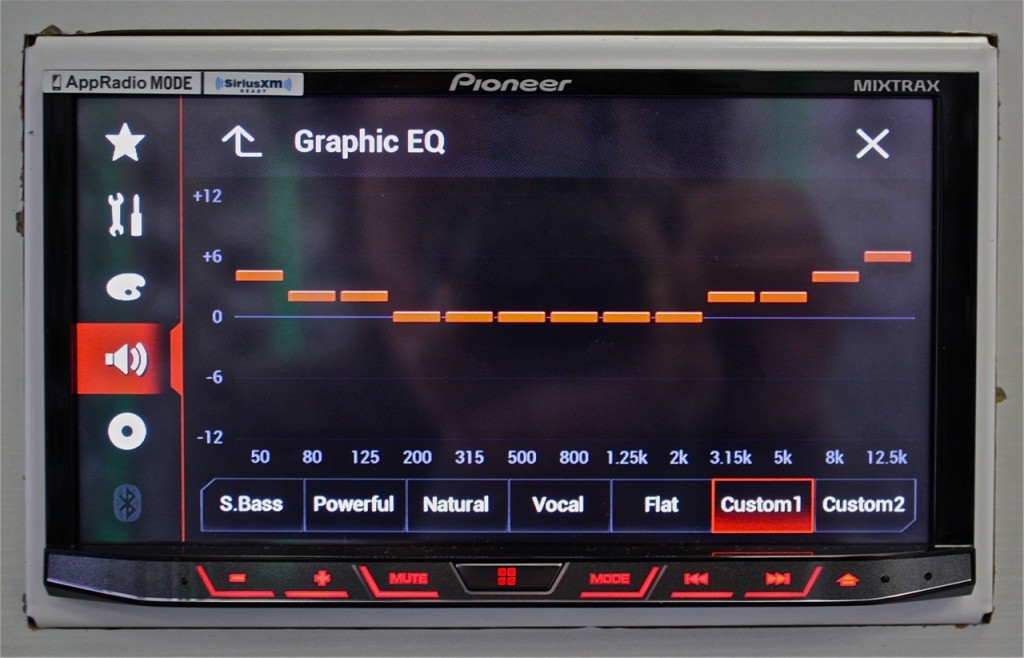
Best Double Din Head Unit 2015 – Pioneer AVH-4100NEX EQ
The best double din head unit of 2015 includes a lot of convenient audio control features including a 13 band EQ.
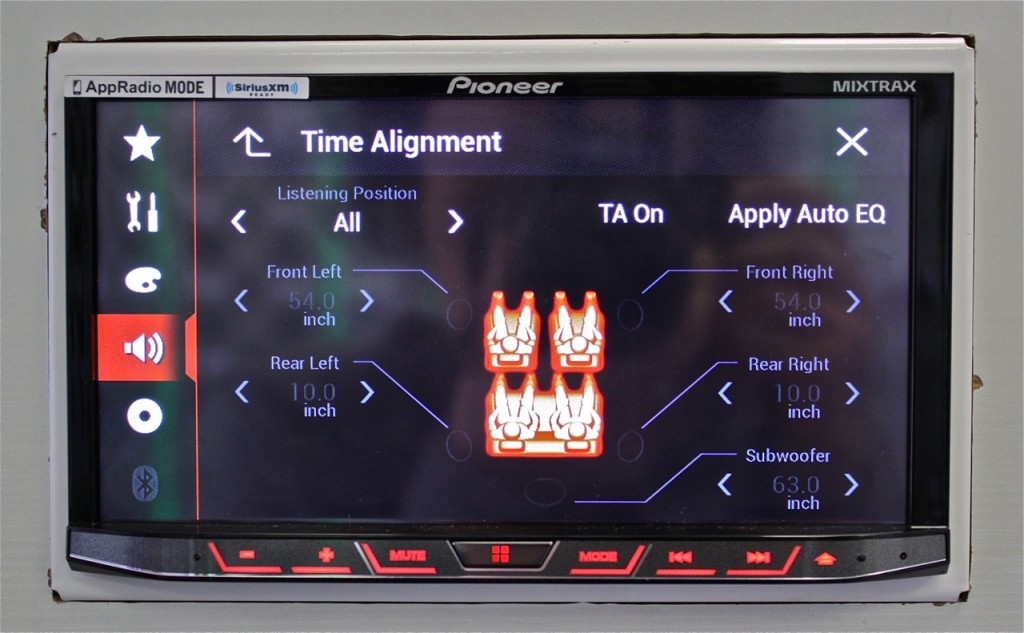
Best Double Din Head Unit 2015 – Pioneer AVH-4100NEX Digital Time Alignment
Digital time alignment – both a basic version and advanced.
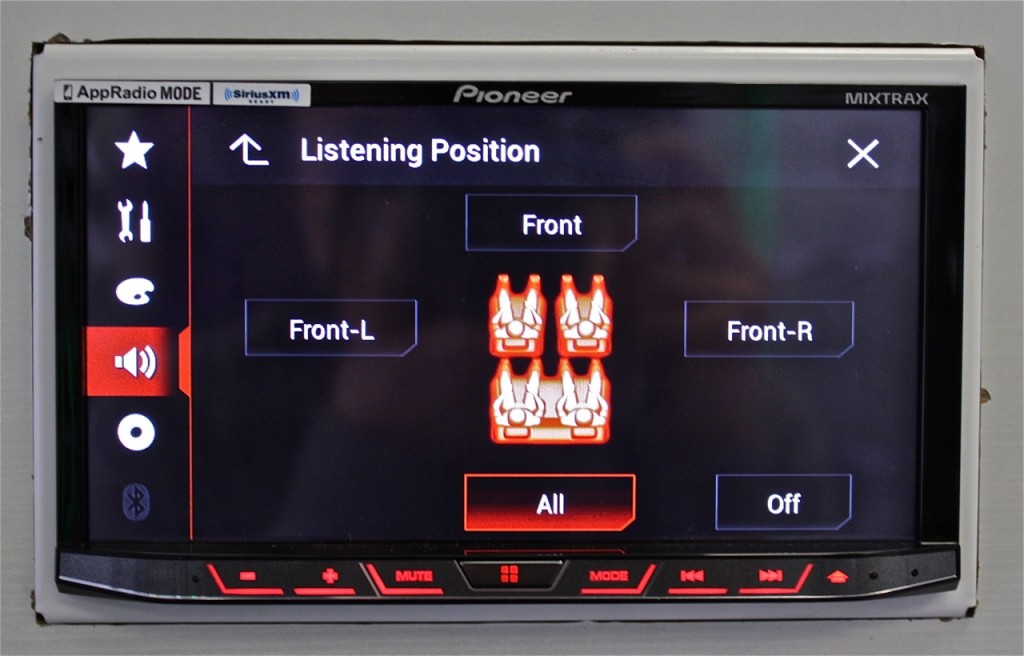
Best Double DIn 2015 – Pioneer AVH-4100NEX Listening Position
Listening position is time alignment for the less tech savvy.
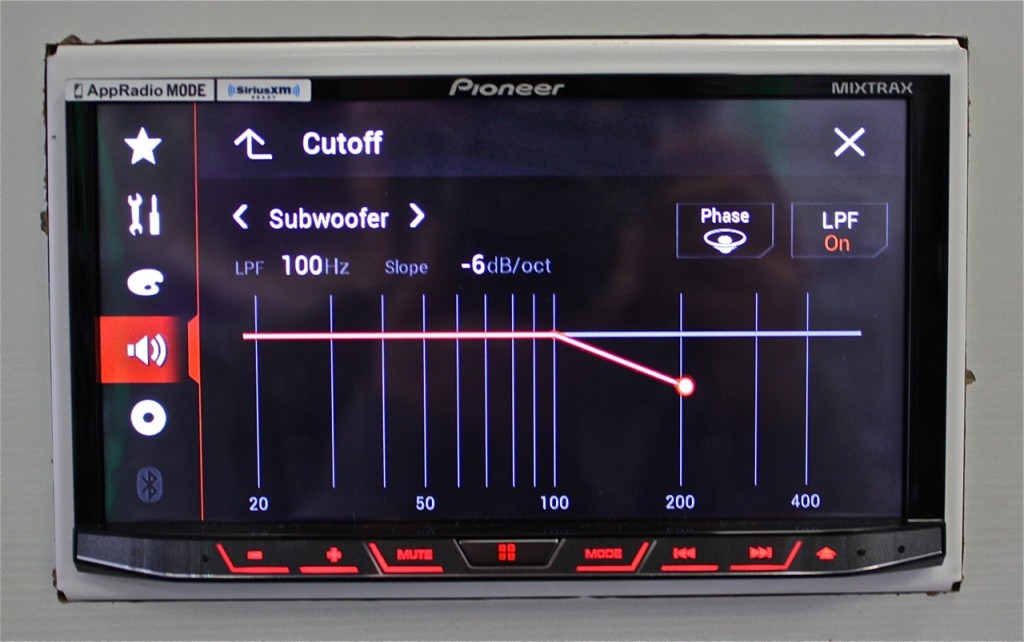
Best Double DIn Head Unit 2015 – Pioneer AVH-4100NEX Crossover Adjustments
Built in crossovers for front, rear and subwoofer with slope adjustment.
With all of these audio control tools along with a 4 volt pre-amp output and FLAC audio playback ability, the AVH-4100NEX can easily serve as the source in a high fidelity audio system.
Convenience features up the wazoo – CD/DVD, Bluetooth, SiriusXM Ready, Pandora, Reverse Camera, HDMI and Detachable Face
I think most consumers expect these features, but they are surprised to find out similar head units such as the App Radio 4 or Alpine iLX-007 lack some of these options. If you want Apple CarPlay and SiriusXM this is where it starts. Both Pioneer’s App Radio 4 and Alpine’s iLX-007 are not SiriusXM ready. Although I don’t care for SiriusXM, some people have to have it. The aforementioned models also lack a CD player. Not a deal breaker for most, but sometimes you want to keep your options open. And that’s really what this head unit does. I can’t think of anything it lacks other than on board GPS and if you need on board GPS, check out the AVIC-7100NEX or AVIC-8100NEX.
It’s one of the very few quality double din heads I’ve come across that has a detachable face. I think this thing belongs in my Jeep because of that feature alone. It’s all these little features that add up to make this such a great head unit. Unlike Alpine’s iLX-007, if you don’t feel like connecting your cell phone through the USB port, this model does have Bluetooth for both handsfree calling and audio streaming. You just can’t use Apple CarPlay or Android Auto unless you’re connected.
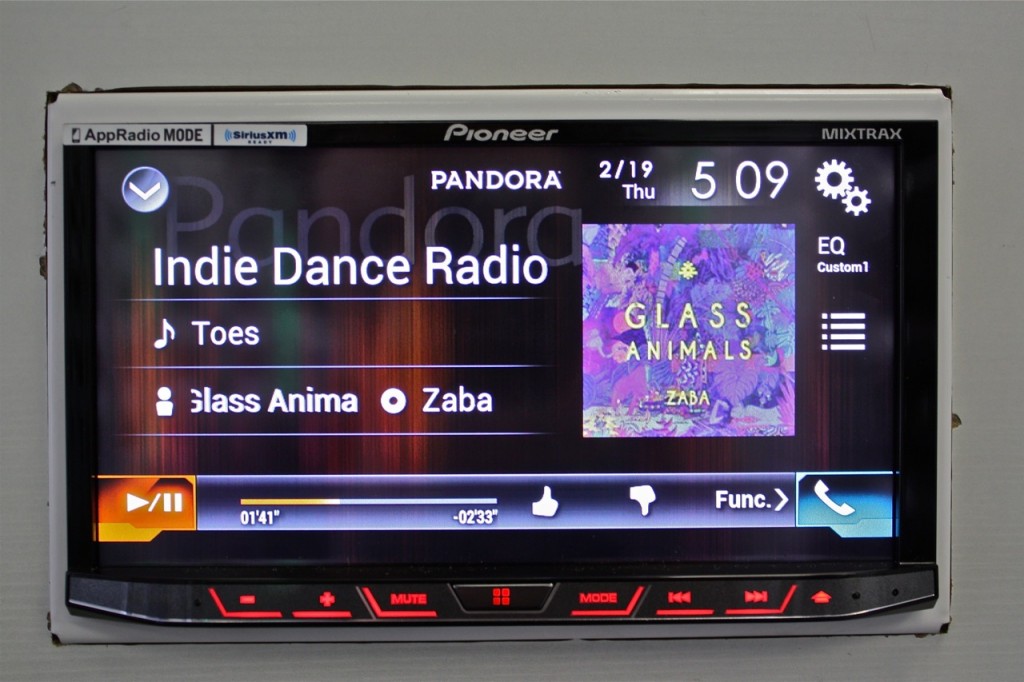
Pioneer AVH-4100NEX – Best Double Din 2015
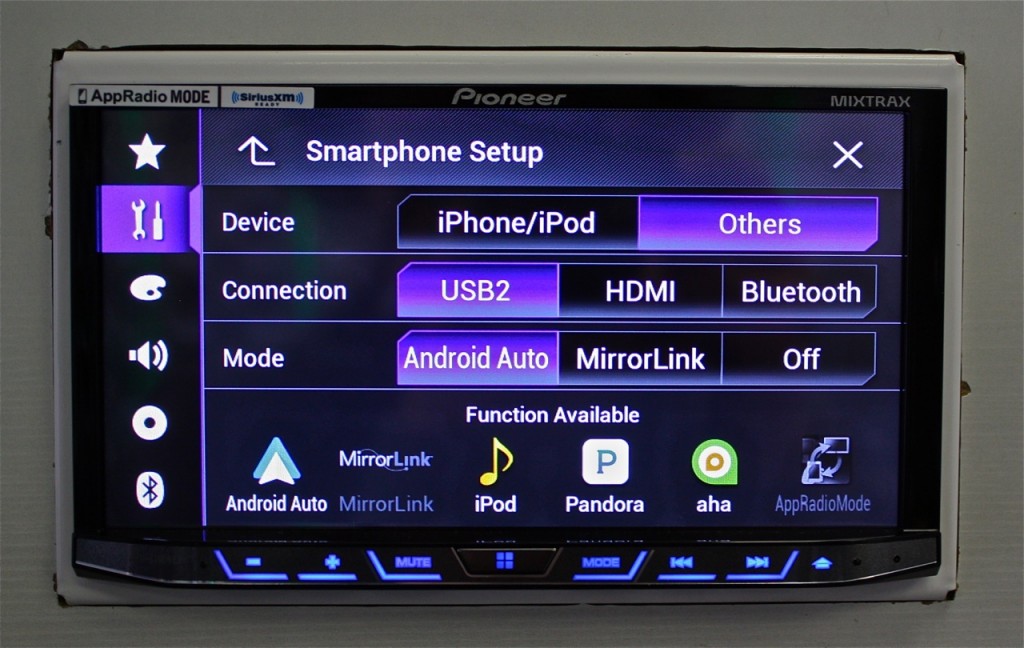
Although Pandora is supported with both iPhone and Android Auto I will tell you it’s a bit quirky to switch to this source for Android users. Because Pandora communicates through Bluetooth with Android devices, Android users must change their Smartphone settings when they wish to use Pandora. Oddly enough, in the Smartphone Menu it appears as though Pandora is an optional source when Smartphone settings are set up for Android Auto:
Best Double Din 2015 – Setting up Android Auto on AVH-4100NEX
However, Android users will not be able to select Pandora when connected through USB 2 in this mode. I believe this is due to the Android Auto software interfering with Pandora. Once Android Auto is launched it locks the phone out so you must control everything from the stereo. The idea behind this is to get you to stop playing with your phone while you’re driving and rely more on voice control. Well, that’s great, except Pandora isn’t an Android Auto compatible app so it leaves you no way to launch the app.
Depending on what Android device you have, you may simply have to disconnect your phone from USB 2 in order to launch Pandora OR you may have to go back into the Smartphone Setup and switch Android Auto to Off or switch the Connection type to Bluetooth. A bit of a pain in the arse right now, but something I think Pioneer, Pandora and Android Auto are working out. This is only an issue for Android users, Pandora doesn’t have any hiccups for iPhone and Apple CarPlay users.
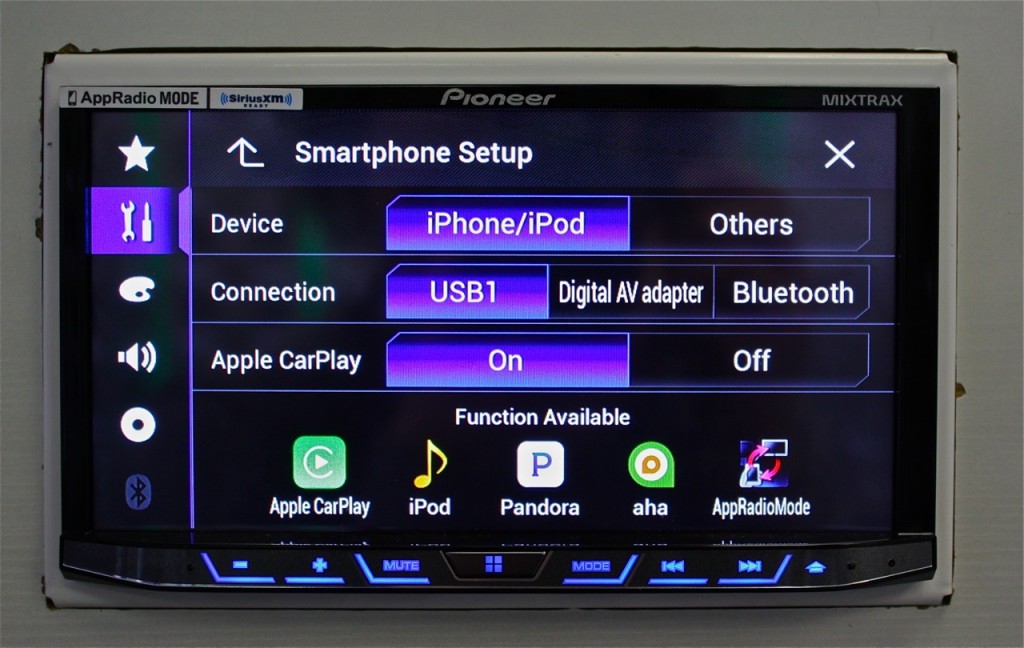
Best Double Din Head Unit 2015 – Apple CarPlay Smartphone Settings
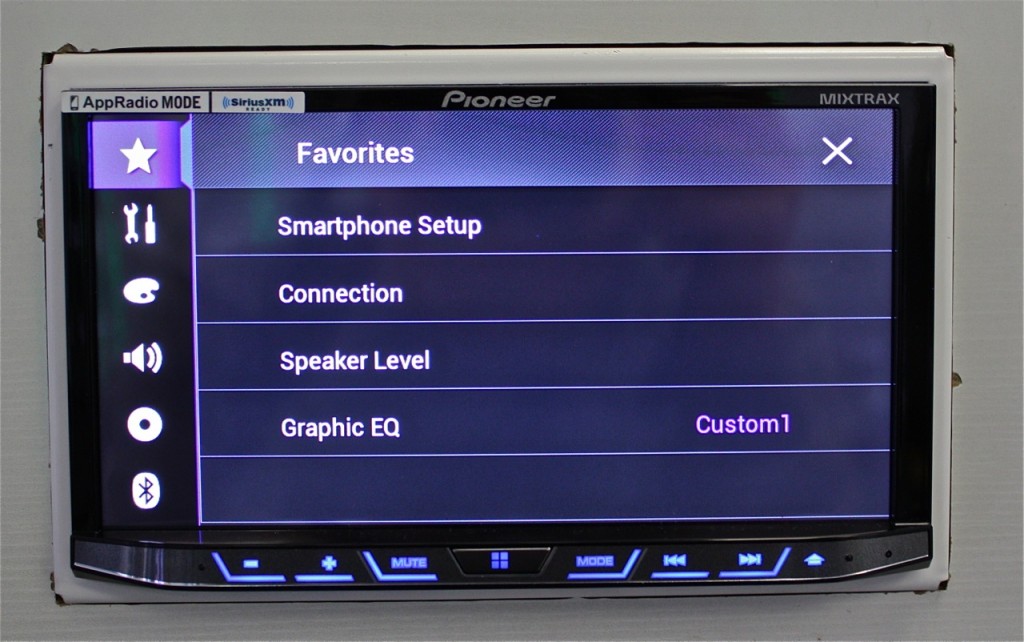
Thankfully it’s easy enough to switch between Apple CarPlay, Android Auto and Bluetooth for Android users wishing to access Pandora. The settings menu of this head unit is laid out in a very functional and logical way. For anyone who will be accessing this menu often (multi-phone users), you can simply create a shortcut and make the Smartphone menu a favorite. Favorites are accessed by tapping the star on the upper left tab. Below you will see a few favorite menu pages I selected based on use in our store demonstrating this model:
Best Double Din 2015 – AVH-4100NEX Favorites Menu
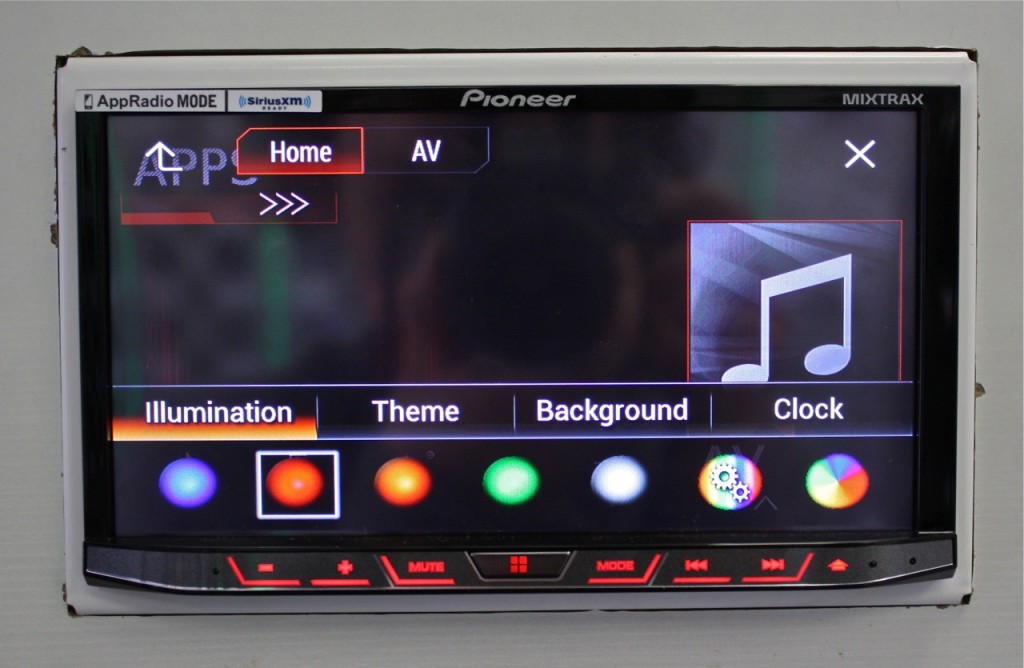
It’s the little things that matter
Although this may seem like a frivolous feature to some, the ability to customize and personalize the display is important – to me and to a lot of consumers. Matching the display to your vehicle’s interior is a perk that makes this double din head unit even more desirable. The Pioneer AVH-4100NEX has a very flexible and customizable display menu.
Best Double Din 2015 – Pioneer AVH-4100NEX Display Features
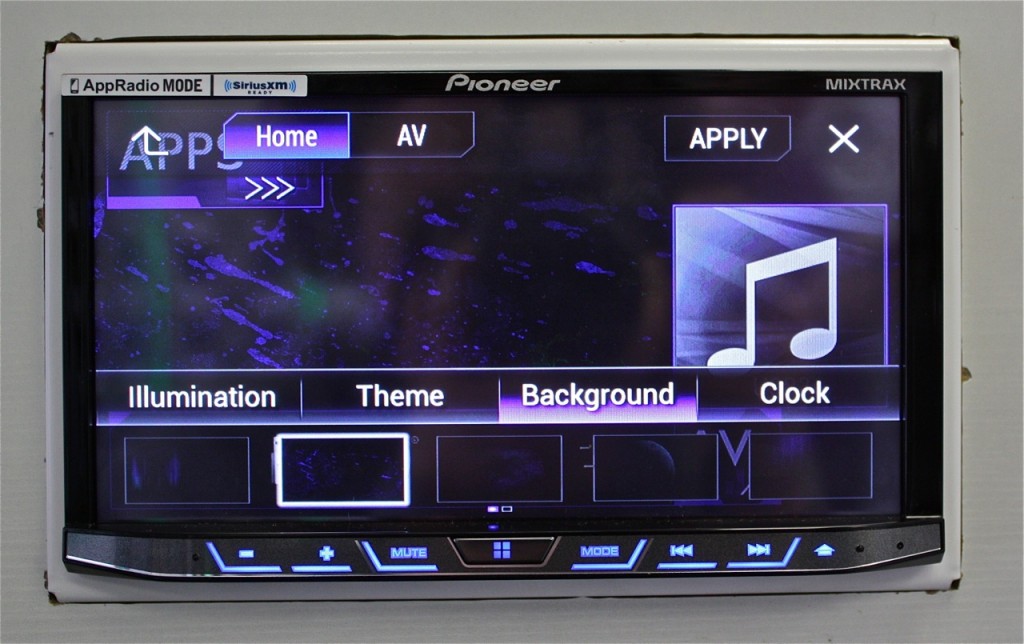
Users can select from several illumination options or go into the custom color menu to fine tune a button color. Additionally, they can select from several different color themes for the main menu as well as select from several different background images (or upload your own).
Best Double Din 2015 – Pioneer AVH-4100NEX Display Features
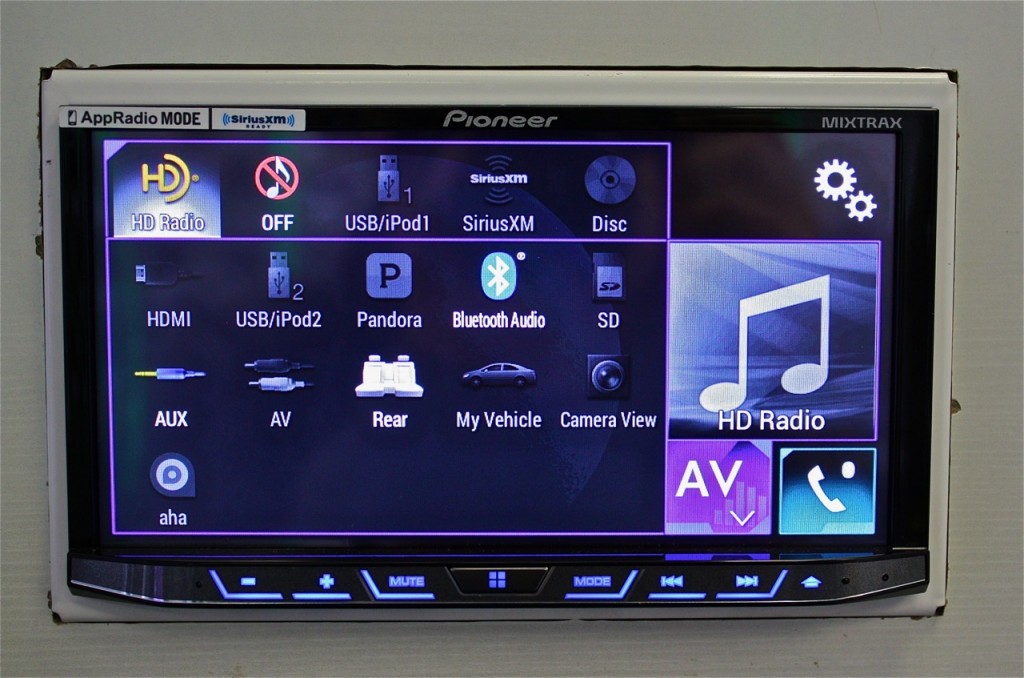
You can also populate the home page with your favorite and most commonly used sources. It’s really easy to do. Drag and drop to the top bar and you’re done.
Best Double Din 2015 – Pioneer AVH-4100NEX Display Features
Pioneer AVH-4100NEX – Best double din head unit 2015
As previously mentioned, I can’t think of any features this head unit is missing. It even has an HDMI input – not that I think you should be using it for anything, but it has it. The attraction begins with the Pioneer AVH-4100NEX when you see the Apple CarPlay and Android Auto functionality, but it really reels you in with all the other features:
4V RCA Preouts
13 Band EQ
Digital Time Alignment
Built in Crossovers with Slope Adjustment for Front, Rear and Sub
Source Level Adjustment
Detachable Face
Bluetooth
Dual USB
Rear A/V in
Reverse Camera Ready
SiriusXM Ready
HD Radio
Pandora
Apple CarPlay
Android Auto
Flexible and Customizable Display
Bright and Responsive 7″ Resistive Touch Screen Display
CD/DVD Drive
FLAC Audio Playback (via SD card)
SD card slot (behind motorized face which by the way you can also tilt/angle)
Unless you need on board navigation, you should visit a shop that carries it and take the Pioneer AVH-4100NEX out for a spin. It’s something you really should see in person and try with your own phone so you can get a feel for how it works. Until Kenwood releases their long awaited Apple CarPlay/Android Auto DDX9902s and DDX9702s or Parrots releases their RNB6, I think it’s safe to say the Pioneer AVH-4100NEX has the lead for best double din head unit 2015.
Recommended install accessories and tips for the DIYer
If you’re going to buy the AVH-4100NEX and install it yourself, there’s a few accessories you may want to pick up to make your install clean and functional:
USB-CBL – Flush Mount USB Port – the head unit only comes with one USB extension cable so it’s a good idea to grab one or two of these for flush mounting and routing USB1 and USB2.
HDMI and USB Flush Mount Port – Convenient if planning of accessing video content from a phone. Will need phone specific adapter.
IS335 – in case you want to use the rear auxiliary input, allows you to flush mount an AUX port.
Let me just get it right out there in the open – I really don’t like SiriusXM for a number of reasons – but I didn’t always feel that way.
When the service was first announced in summer 2001, we were all very excited at our car audio shop. What a cool idea! Digital radio, no static, a variety of music genres, news, talk, and comedy? And we get free demo subscriptions for selling it?? Even better.
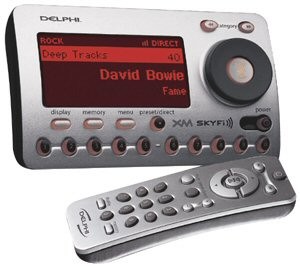
To really understand the excitement we experienced, you have to think back to a time when the iPod was still a relatively new gadget that came loaded with limitations. Even if you did have the newfangled MP3 player, you still had very limited options for connecting it and playing it through your car stereo. Most car stereo’s were not capable of playing an iPod unless you wired it through an AUX jack and if you did do that, you were lucky if it stayed charged for more than 60 minutes.
XM Skyfi – One of the original XM Radio receivers
I’m just trying to remind you all that when satellite radio first launched, digital music was a pretty new concept. It was a great way to have access to a variety of digital music in your car without worrying about transferring music from your computer onto a device and trying to figure out how to keep the dang thing charged up long enough to play.
As an early adopter of the product and service, I have seen satellite radio grow and change a lot over the past 14 years. Sadly, at this point, I see no need for the product and I honestly cringe when a customer asks for it. I cannot stand selling and installing it for the reasons outlined ahead.
Siriusly Compressed
When satellite radio first came out it sounded pretty good. It wasn’t exactly CD quality, but it was still pretty good. However, as the competition heated up between Sirius and XM, the compression increased. Bandwidth was squeezed and each provider added more channels in an attempt to be more attractive than the other. When service first started each provider had around 120 channels to choose from (from recollection – I can’t find an original channel line up). Now the combined SiriusXM offers more than 175 channels.
So how badly is it compressed? How about 32 kbps (kilo bits per second). Let me put that into perspective for you. When you buy a CD in the store (I think they still exist) the CD relays 1411 kbps of information. So let’s do the math.
Okay, so 32 divided by 1411 equals about .02 or we can call it 2%. You’re listening to 2% of the original information. What does that mean? You lose:
Detail
Nuance
Depth
Richness
Clarity
Body
Fullness
Warmth
98% of the original audible information the artist intended to relay
That is why satellite radio sounds so tinny and hollow. That is why it has no bass, no warmth, no punch. Don’t get me wrong – It’s fine for news, talk, sports and entertainment, but PLEASE, for the love of God, do not listen to SiriusXM for music and then complain to me that it sounds bad. This is why it sounds bad. You can’t make 32 kbps sound good, you just can’t. It’s going to sound bad. Why would you want to listen to something that sounds bad? I just don’t get it.
Inconsistent Audio Quality
You would think SiriusXM would sound just as crappy from vehicle to vehicle and stereo to stereo, but it doesn’t. The level of crappiness varies based on hardware. Your SiriusXM in your Chevy Tahoe will not sound the same as your SiriusXM in your Toyota Camry or your SiriusXM connected to your aftermarket Alpine stereo.
You see, some manufacturers utilize internal equalization adjustments within their stereos that are source dependent. This is a nice feature. They do this so there is no large drop in output and quality when switching from various audio sources like CD, USB, Satellite Radio and FM/AM. In reality, all of these sources will have different quality, different bandwidth and different compression rate. In order for the driver to have a more pleasant experience, these stereos will internally adjust audio levels in order to provide a more seamless listening transition between sources.
Some aftermarket stereos offer this feature called Source Level Adjust or SLA. Some even have different equalization memory per source. This allows users with an aftermarket stereo to emulate the same kind of smooth transition between sources as described in the scenario above.
On the other hand, some stereos (stock or aftermarket) have none of these features. In that case, when you switch between your iPod or CD or FM/AM tuner and then over to SiriusXM, you will notice how compressed, tinny and hollow it sounds in comparison to your other higher quality audio sources.
Unfortunately, even with an advanced equalizer and source level adjust, there is still only so much you can do to help 32 kbps. It will still sound bad compared to a song downloaded from iTunes in Apple Lossless format. It just won’t sound as bad with features like source level adjust and source independent equalization. To the untrained ear, you might not realize this. That is until you get into a car without these features and holy hell, you’re pissed and wondering why it sounds so bad in your new Toyota FJ Cruiser compared to the Chevy Tahoe you just traded in.
My point is if you think it sounds good in one car, that doesn’t really mean anything because it’s acoustical trickery. At some point in time you will encounter SiriusXM in it’s raw state. And when you hear that A/B comparison as you switch between your FM radio and your SiriusXM radio (without any internal equalization or adjustment) you will be disappointed. That is the true nature of the source.
This has been a very frustrating experience for many customers. I’ve had people march into my shop looking for answers that they can take to their dealer after buying a new vehicle. These customers are convinced they have a bad tuner and believe the dealer needs to put in a new one. Why? Because they had it in their last 3 Nissan’s and always loved it, but cannot believe how bad it sounds in their brand new Chevy Traverse. I have to gently explain to them how it works, why SiriusXM sucks and how there is really nothing they can do about it.
All of these examples I am giving you are from real customer experiences. It’s all over the place. There is no consistency in what each manufacturer does within their stereo, but the tuner is always relaying the same information.
Inconsistent Signal Reception
You would think there is one service provider so there is one type of tuner and one type of antenna. Unfortunately that’s not the case and this can lead to very inconsistent signal quality from vehicle to vehicle and stereo to stereo.
At the moment, the universal aftermarket SiriusXM tuner is the SXV300 made by Audiovox. This is a combination SiriusXM tuner which works off of satellites from both providers. This is really helpful for coverage. There was a time that I had service from both providers in my own vehicle. During this time, I found that wherever XM cut out – Sirius would not and wherever Sirius would cut out – XM would not. So it is nice that these newer tuners have better signal coverage. However, I don’t believe they work off of repeaters like the older XM receivers and antennas used to.
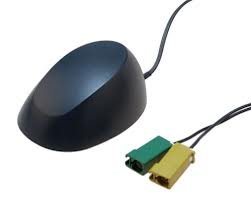
The antennas that worked off of repeaters were awesome. You could travel into New York City and go under tunnels, past tall buildings and the signal didn’t cut out because it was working off of both satellite and local area repeaters. These antennas typically had two connections. One was satellite based and one was terrestrial like the connection shown here:
Dual Style Sat Connection – Worked off local repeaters and satellite for better coverage.
The newer style antennas are just a single satellite connection. However there are still some vehicles that have this style antenna and still operate off both terrestrial and satellite signal. What does this all mean for you the subscriber? You will have varying and inconsistent satellite coverage depending on what equipment your vehicle comes with.
In my experience, the factory Toyota/Lexus tuners and antennas seems to have the worst reception. I believe they are have no buffer and work off of XM satellites only. I seem to get the most complaints from customers with Toyotas and Lexus factory Satellite radio equipment. These customers can at least install one of the newer combo tuners with an interface from VAIS Technology that will pull signal from both satellites.
Up here in New England, we have seasonal coverage issues. I have customers that love their satellite radio in the winter, when the trees are bare, but as soon as the leaves grow in, coverage becomes spotty and inconsistent. We have a lot of windy tree covered roads up here which can put a Sirius damper on your SiriusXM listening experience. I bet the engineers didn’t really think of that when they decided to lose the terrestrial connector.
Poor Equipment Quality
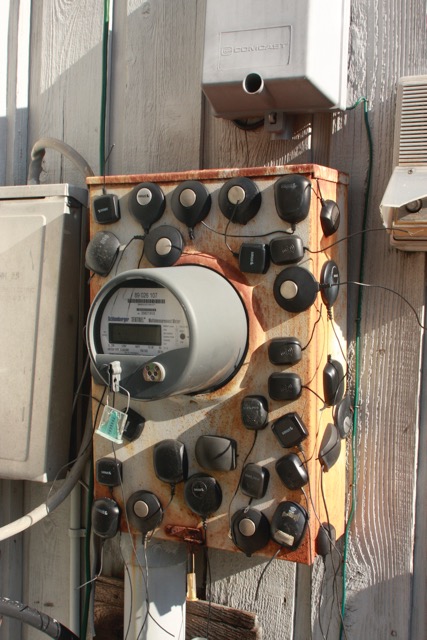
So check this out – the SiriusXM tuner SXV300 sells for around $50 and it comes with a 90 day warranty. You know how much an installer is going to charge you to put that in your car? At our shop we charge one hour labor to install this tuner to a SiriusXM ready vehicle/stereo. One hour with shop parts equals $86.63. So what happens in a year when the flimsy antenna craps out and needs replacing?
It will end up in our SiriusXM antenna resting place and you’ll be looking at a bill for $120+ to replace it. That’s $30 for the antenna (another 90 day warranty), another hour labor to install it and local sales tax. And when you live in an area like New England with extreme temperature/weather swings between Summer and Winter you can expect to replace your SiriusXM antenna at least once during your life as a subscriber. Keep in mind, SiriusXM themselves only expect it to last at least 90 days.
Non Existent Incompetent Customer Service
If you happen to have a lifetime subscription that needs transferring, be forewarned they will screw it up. I have had nearly all my lifetime subscriber customers experience this frustration. As an early supporter, they bought in to a lifetime subscription years ago when Sirius and XM were offering these. These customers shelled out over $500 when each provider was only charging around $10 a month for service. They figured they would always have the service and it would pay for itself in 5 years.
However, most lifetime subscriptions included lots of fine print such as only being allotted up to 3 total transfers (should your tuner fail or you decide to buy a new car). Additionally, you may be charged $75 per transfer. Once you get past all that and pay your transfer fee to get your lifetime service swapped, you will experience one of two things. Either you will not have your full channel line up or you will keep losing your channels as though it was never activated (preview channel and channel 0 will work).
When you call SiriusXM they will insist it is a hardware issue and want you to have the brand new tuner swapped out. Don’t drink the koolaid. It’s not a hardware issue, it’s a programming issue and it will take you hours to find a customer service rep with half a brain cell that knows this and can complete the transfer properly.
Virtually No Profit Margin
I don’t know about you, but I don’t work for free and I don’t expect anyone else to either. Apparently, SiriusXM expects its retailers to and for that they suck. As a retailer, there is no mark up in this stuff – like none. In fact, many SiriusXM products are below wholesale on Amazon Prime by a few bucks. Sad, but true.
When the service first came out, hardware was being manufactured by car stereo manufacturers like Pioneer, Kenwood and Alpine. These car stereo companies are in business for profit like us. They understand that we, as retailers, need to sell and install profitable items in order to make a living. So it made sense that these manufacturers sold satellite radio product to us at a wholesale price with a manufacturer suggested retail price that actually included a profit margin. How thoughtful!
Additionally, as a supporter and retailer of Sirius and XM products we were given a Sirius and XM dealer account number. We even received a commission for each satellite radio we activated. It wasn’t huge, but it was something. I would could call it a “Thank you for supporting our growing company” spiff. Imagine this: Sirius and XM also provided us with a dealer support line so activating a customer’s radio was easy. Transfers were no problem. We always reached a customer service rep in a timely manner that could understand what we were trying to do and take care of it the first time we explained it.
Now? Ha! None of that. There is virtually no profit margin in the product. As a consumer, you can buy it direct from SiriusXM well below wholesale when you include a 6 month subscription. As a retailer, I have a long list of reasons not to sell SiriusXM:
No more profit margin.
No more dealer account number.
No more commissions.
No more dealer customer support.
No more demo accounts.
Summing up all the reasons SiriusXM sucks
Retailers and consumers alike who care about sound quality and product quality will probably agree with my list of reasons why SiriusXM sucks:
Incredibly compressed
Inconsistent quality
Inconsistent reception
Inconsistent hardware quality
Non existent customer support
No dealer support
Slim to no profit margin
With so many high quality music and radio apps available I encourage my customers to use their smart phone. Pandora, iHeart, Spotify, Tunein, etc. all transmit at a much higher compression rate which means much better sound quality. And with the generous data plans available, data usage really isn’t as much of an issue as it used to be. My husband John and I share a 30 gig plan and we’re never over on our data usage and we listen to music apps and pull music from the cloud exclusively. One last thing to note – in our hilly, tree covered area, we tend to get better cellular coverage vs SiriusXM satellite coverage. So I ask you, why bother with SiriusXM? Is there something I’m missing?
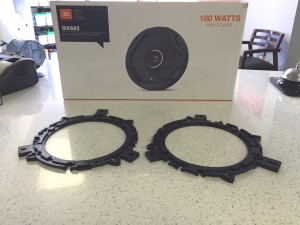
Sweet! Free set of JBL GX602 speakers to review – Wait, can I even sell these in my own shop?
JBL GX602 Review
I really didn’t know what to expect when the folks over at Harman graciously offered to send me a sample of their JBL GX602 speakers for review. As a small car audio shop owner, I was aware of the brand, but never had any real hands on experience with the product.
For those of you that don’t know, Harman is huge in the car audio industry. Like really, really huge. Their family of brands includes (but is not limited to) JBL, Infinity, Harman Kardon, Becker, Mark Levinson and the more recently acquired Bang & Olufsen. Their audio and infotainment products are used in more than 80% of the world’s luxury vehicles.
These guys are serious about understanding and implementing the science behind good sound. They spend a lot of time and money in research, design, development and product testing. They even have a state of the art facility in Northridge California called the multiple listening lab specifically created for loudspeaker research and testing. This facility houses a one of a kind invention called a speaker shuffler specifically created for their own double blind product testing.
You may be wondering, “Well if they’re that big and that serious about car audio, why don’t you carry JBL in your store?”. Well, until recently, JBL was sold almost exclusively to large retailers like Best Buy or Crutchfield. Thankfully, once again Harman is seeing the value in small independent shops like mine and they are changing their distribution model. I’m pretty happy they are making this shift because these speakers do rock and I gotta have them in my shop.
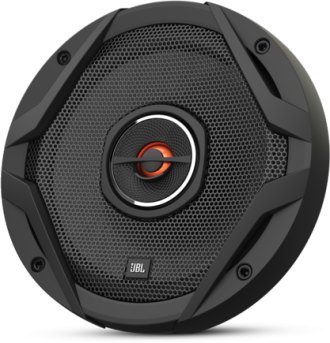
JBL GX Series – Best Entry Level Car Audio Speakers
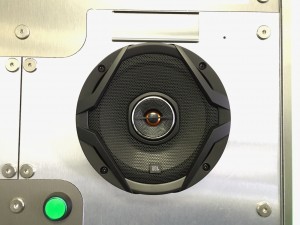
After installing these in our sound board and turning them on for the first time, I was pleasantly surprised. To the point where I grabbed my husband John and said, “Babe! You gotta take a listen to these – they’re really good!”.
JBL GX602 Review – On My Display Board
The JBL GX series speakers definitely made an impression on me. For a variety of reasons, I feel these are the best entry level car audio speakers I have heard. When I say entry level, I mean the land of $99.95 6.5″coaxial car audio speakers.
Efficiency and Output
The JBL GX602 speakers are incredibly efficient – surprisingly efficient. Increased efficiency means these speakers will play pretty loud with minimal power. Harman attributes this to their patented Plus One Woofer Cone technology. This design creates up to 35% more surface area on the woofer cone. The increased surface area equates to higher efficiency and sensitivity. In audible terms, there is an undeniable difference in output between the JBL GX602 and the leading competitors entry level 6.5″ speakers. In other words, they’re louder than their competitors. This also has to do with the fact that these speakers use dual 3 ohm voice coils creating a nominal impedance of 2.3 ohms. Standard car audio speakers are single voice coil 4 ohm. The slightly lower impedance allows slightly more power to flow from the head unit or amplifier to the speakers.
Balance and Clarity
They’re not just loud, they’re clear and tastefully balanced. I auditioned the JBL GX602 speakers with a variety of music. From Sheryl Crow’s “We Do What We Can” to Mark Ronson’s “Uptown Funk” and a little bit of Nelly Furtado’s “Fresh Off The Boat”. Over a variety of genres and songs, the JBL GX series speakers consistently performed in a loud, clear and accurate manner without any level of harshness. I was surprised at how smooth they were considering their “in your face” presence.
Directional Tweeter
JBL also uses a special tweeter deflector which helps to direct and disperse top end detail to the driver. I LOVE this feature. I usually use this line to up-sell a customer to component speakers, “What good are tweeters if they’re aimed at your ankles?”. That’s essentially what you’re doing with a traditional coaxial speaker mounted in your door. However, with JBL’s tweeter deflector, this is less of an issue. For the customer who can’t make the investment into components (or doesn’t feel like installing them), this little feature really helps to direct that sound stage up to where the driver can hear it.
JBL GX602 Review – Should you buy them?
I love these speakers for the customer who:
Is interested in doing a full systemon a limited budget (head unit, speakers, amp/sub). These customers will benefit from the sound quality of these speakers and the increased efficiency. A subwoofer will add depth and punch and really compliment the range the GX series are capable of.
Is replacing blown stock speakers. Perfect for when a customer walks into my shop and they just want to replace blown or dry rotted stock speakers, but they still want to keep the stock head unit. Other brands are less efficient and depending on the stock stereo, they may actually end up being quieter than the original stock speakers. These speakers are an ideal upgrade for anyone with a stock stereo looking to upgrade speakers.
Wants it loud, but can’t afford an amp. If you’ve already blown your aftermarket speakers, but you are not willing or able to invest in a 4 channel amp, you should buy these speakers. They will play louder than many competitors speakers all due to that increased efficiency and 2.3 ohm load.
Interested in value. These speakers include gasket tape, speaker mounting adapters, screws and hardware. The gasket tape and mounting adapters could otherwise add another $20 to your install. The fact that they are included shows these speakers are a great value.
JBL GX602 Review- Speaker Adapters, Gasket Tape and Hardware Included.
Although I only listened to the JBL GX602’s, the GX series is offered in a variety of sizes from 3.5″ to 6″x9″ and everything in between. After listening to these speakers I emailed Harman,” Wow- I gotta have them”. I look forward to meeting my JBL rep next week and carrying the JBL GX speakers in my own shop. What do you guys think? What kind of experience have you had with JBL products?
Car Stereo Installation Accessories – Want to Know What the Pro’s use?
Car stereo installers have a reputation for being somewhat finicky and, for lack of a better word, particular (okay, you could say they’re primadonnas). They only like to use specific products, tools and accessories when installing car stereo electronics and accessories. They have to have these wire ties, this kind of electrical tape, these crimp connectors, this brand steering wheel control interface etc. I do all the ordering at our shop so trust me, if I order something they don’t like I hear about it. If I order something they like I hear about it. If we’re missing something they like, I hear about it. You get the picture.
I decided to put a list together of the most common and revered car stereo installation accessories used in our shop. These are our top 5 car stereo installation accessories. These are the installation accessories our installers use every day and refuse to install without.
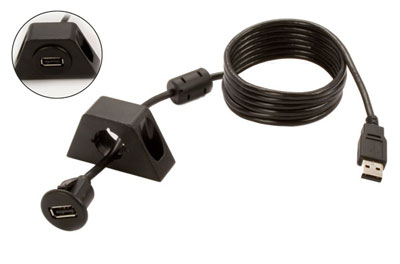
Car Stereo Installation Accessory #5 – USB flush mount port
This little accessory is very handy and highly recommended for anyone installing a stereo with a rear USB port.
USB Flush Mount Port
Sure, you could just route the USB over to the glove box and just have it kind of hanging out in there. That’s easy to install, but not necessarily convenient. You would have to reach over to the glove box every time you want to connect your phone or iPod.
Instead, you could do something cool like flush mount the USB port in a more convenient location such as your dash or center console. The USB port is pressure/snap fit. All you have to do is drill and/or file out a hole slightly smaller than the port itself and route the USB extension to your stereo’s rear USB port.
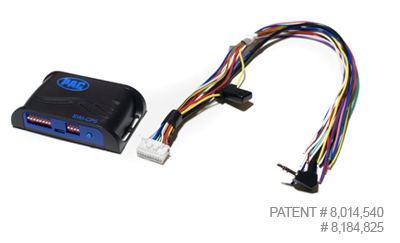
Car Stereo Installation Accessory #4 – Pac Audio SWI-CP5
The Pac Audio SWI-CP5 is one of the easiest steering wheel control interfaces to program and also one of the most versatile. Aside from being a steering wheel control interface, the Pac Audio SWI-CP5 can also provide Retain Accessory Power (RAP). This interface is compatible with vehicles equipped with LAN, LIN, CAN, Class II, Analog or Serial Data SWC.
Pac Audio SWI-CP5 Programmable Steering Wheel Control
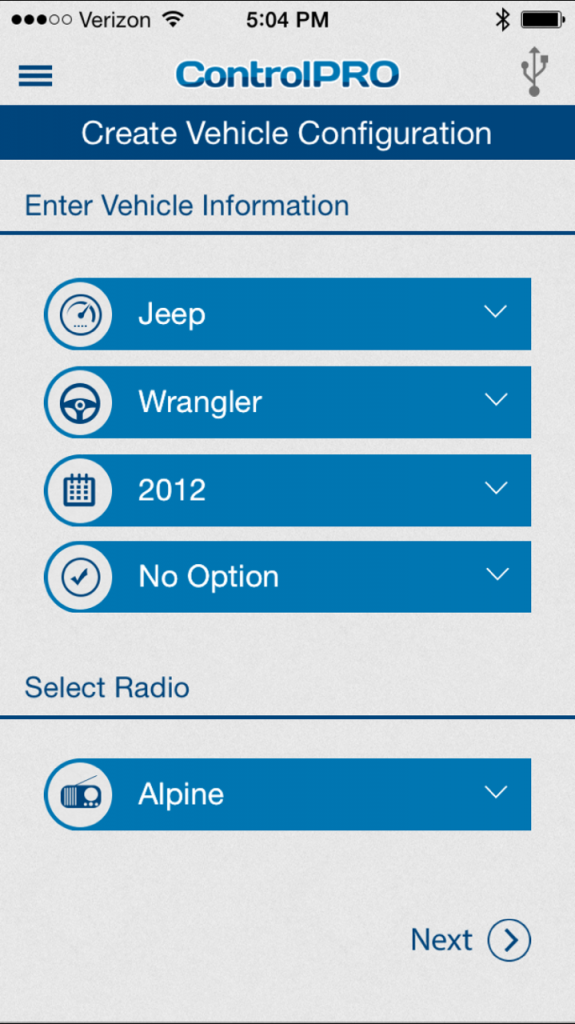
What’s probably the coolest thing about it is you can program it using your iPhone or Android. If you don’t like the whole app idea, more traditional programming can be done via PC, USB drive or you can even manually program from the device itself. However, programming via the app is extremely easy and the process is pretty self explanatory once you get the app open.
PAC Audio SWI-CP5 Programming via Smart Phone
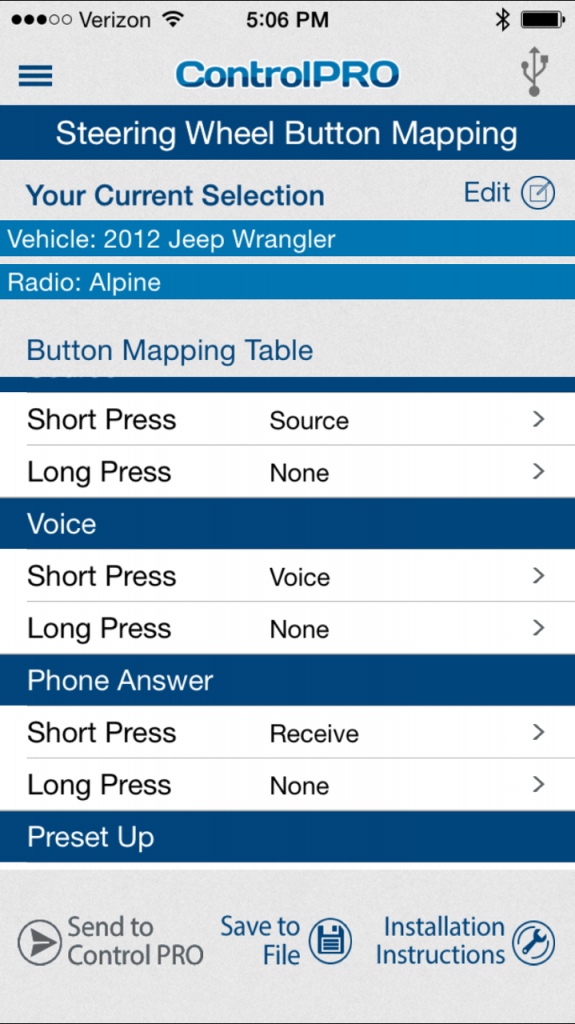
It’s really easy to re-map existing buttons for new functions. You can even add two functions per button; one function for a short press and another function for a long press. This is an awesome feature for vehicles that may only have 5 steering wheel control buttons like Mode, Volume Up, Volume Down, Track Up, Track Down. You can assign additional functions through a long press, thereby adding the ability to Answer, Hang Up, or prompt Voice Control by simply pressing and holding one of the steering wheel control buttons.
What if you have a factory Voice Control button and you want to re-use that feature with your new stereo? Check out how easy it is to re-map a Jeep Wrangler’s Voice Control button to work with this Alpine stereo’s Voice Control feature.
PAC Audio SWI-CP5 Remapping Buttons
You can see the default setting for an Alpine stereo in a 2012 Jeep Wrangler shows no function for the factory Voice Control steering wheel button.
PAC Audio SWI-CP5 Re-assigned Voice Control
Simply tap the feature you want to change and select the function you want to assign to it. Voila. Now your factory Voice Control steering wheel button will control your Alpine stereo’s Voice Control feature. It’s that easy.
Car Stereo Installation Accessory #3 – Hellermann Tyton 18 lb 8″ Wire Ties
A good quality wire tie is an absolute must for any car electronic installation. Over the past 30 years our shop has tried numerous brands and models of wire ties. However we have found (like most things in life) you get what you pay for – wire ties are no exception to this rule.
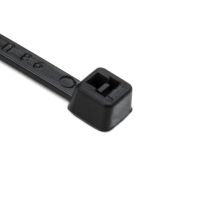
Hellermann Tyton 8″ 18lb Wire Ties
The Hellermann Tyton 8″ 18 lb wire ties are our favorite (manufacturer part # T18L0M4). They’re not cheap, but they’re good quality and worth every penny. It’s important to have wire ties that are not thick and bulky so they are easy to work with, but at the same time, they also need to be strong and be able to withstand extreme heat and cold.
The Hellermann Tyton T18L0M4 have an operating temperature range of -40 degrees Fahrenheit to 185 degrees Fahrenheit. This might seem extreme, but in an area like Connecticut we see some pretty extreme temperatures. We have many negative dips in Winter and extreme highs in the Summer of around 100 degrees or higher. At our shop, we offer lifetime warranty on installation and we really don’t want our wire ties failing – ever. We expect our wire ties to last as long as the vehicle lasts. Cheaper wire ties will simply crack over time especially after being exposed to excessive heat and cold. If you want to use what the pro’s use, get yourself some Hellermann Tyton 18 lb 8″ wire ties.
Car Stereo Installation Accessory # 2 – Scotch 3M Super 33+
The number two car stereo installation accessory is something most people never even give much thought to, but they should. Having a good quality electrical tape can make ALL the difference in a car stereo installation.
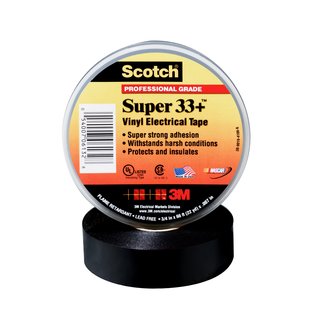
3M Super 33+ – The electrical tape for professionals
There’s a reason Scotch 3M Super 33+ is rated the number one seller in the electrical tape category on Amazon – it really is the best electrical tape out there and it is the choice of professionals across various industries. It’s strong, it’s flexible, it’s easy to work with and it lasts. Do not waste your time and money on cheap electrical tape. After 30 years of installing, we have found no better electrical tape than Scotch 3M Super 33+.
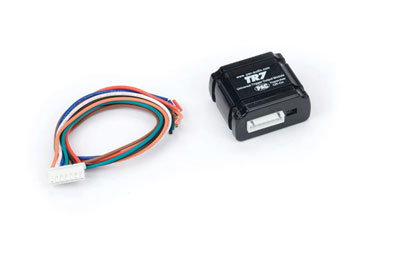
I talk about the TR7 a lot of this blog because most of the double din head units on the market will require a TR7 to access full head unit functionality (all but Kenwood that is – you can still just ground their parking brake wire. Please don’t be duped by anyone trying to sell you a Kenwood parking brake bypass. Yes, they’re out there and it’s a complete and utter rip off!).
PAC Audio TR7 – more than just a parking brake bypass
The TR7 comes pre-programmed for the video bypass, however, it’s much more than a simple video bypass tool. This handy little car stereo accessory is programmable for various other functions. Its list of features and functions is quite long and diverse making it a staple car stereo installation accessory in every shop.
Check what this versatile little interface can do:
Low voltage trigger
Supplies a 12 volt remote output for an aftermarket amplifier when used with a stock head unit that does not have a remote output. Use the TR-7 to supply a 12 volt output from a 5 volt remote source, like from Ford radios. Use on some vehicles that have a negative antenna output and convert to a positive output.
Alpine/Pioneer/Clarion video bypass
This will bypass the parking brake video procedure common in most double din touch screen head units. PAC Audio warns: It is dangerous (and illegal in most states) for the driver to watch the TV/Video monitor while driving the vehicle. The driver may be distracted from looking ahead and an accident could occur. Install the TR-7 only in RV and Marine applications where there is no parking/hand brake to interface to. Do not install the TR-7 where the driver may be able to view the monitor when driving.
Latching outputs
Turn on headlights, neon lights or radio from an alarm with a momentary output or from a momentary switch. Upon a number of pulses within a user programmable time, the outputs will latch. Upon a number of pulses within a user programmable time the second time, the outputs will unlatch. You may program how many pulses to latch and unlatch. Use to turn on aftermarket driving lights by using existing parking light switch.
Double pulse output
Pulses outputs twice when trigger from a constant or pulsed signal. Use for alarm applications where the unlock wire needs 2 pulses to unlock all doors.
Closed loop circuit
Good for monitoring trailers on hitches by triggering an aftermarket alarm if the trailer is disconnected from the vehicles hitch. Also monitors stereo equipment in vehicles.
Pulse extender/delayed turn off
Upon a constant or pulsed trigger, the TR-7 will turn on the outputs. As soon as the trigger is disconnected, turned off or at the end of a pulse, the timer will count up to the number of seconds recorded, at which time the outputs will turn off. Good for turning on headlights at night for convenience. Extend alarms output from 1 second to 3 seconds for Mercedes vacuum door locks
Linear actuator controller
Open/close amplifier racks from a momentary source like from a alarm’s negative output. Sequence is : Start, Stop, Reverse, Stop.
Door lock pulse generator
Good for automatically locking and unlocking door locks when ignition is turned on and off.
Channel splitter
Split 1 channel from an alarm to 2 outputs. Both outputs are user programmable for pulse, latched or timed output.
Pulses to timed output
Upon a number of pulses within 5 seconds, the outputs will turn on and delay for the amount of programmed time, then the outputs will turn off.
Turn on pop delay
Delayed amp turn off
Upon a constant trigger, all 3 outputs are user programmable to delay before turning on outputs or turning on instantly then delay before turning off outputs. Good for situations where you need more than 1 timer but on a different timer period, without having multiple modules.
So many uses in one little part! It’s no wonder the TR7 is one of our favorite car stereo installation accessories.
Now You Know
So there you have it. The top 5 car stereo installation accessories used by professional installers. This list may not be sexy or sophisticated, but it’s downright practical and informative. Using these tried and tested accessories in your car stereo installation will make your life (and your install) much easier. Thanks for reading! I hope you enjoyed this post.